If you haven't already started with Part 1, I'd encourage you to check it out first. It adds a bit of context to this project and gives a rather detailed review of how I was able to assemble a Golden Tee Showpiece cabinet.
Build or Buy?

At the time when I had made the decision to build a Golden Tee cabinet, I still wasn't convinced on how I actually intended to play to game. eBay is littered with original hardware from some of the older Golden Tee games, but I also knew the game could be emulated via MAME.
While my preference would always be to get original hardware, I was mostly concerned being able to get a playable version of all of the courses as well as having a sound bit of hardware. The version I had as a kid had perpetual issues with "low voltage" amongst other oddities that likely reflected more than a decade of wear and tear at a local bar.
So let's scope it out roughly on eBay. In this case, I was poking around for the Golden Tee Fore! hardware, more on that shortly.
- Original arcade board -$300 (?) ... I couldn't even find a working version of the board online. All the listings I found said "not working", and they were still selling for a few hundred dollars. Given how niche the game is now, this isn't likely the case of some bar owner piecing out their own arcade; it's likely more a reflection of an experienced arcade technician trying to recoup costs on a broken board hoping that someone will buy it thinking they can fix it.
- Power Supply - $80 ... a few random arcade parts shops seem to carry old power supplies here. If you go this route, you'll have to match the power supply to the board (red or green). It's also unclear to me if you'll need additional adapters.
- Hard Drive/ Full Game "Conversion Kits" - $185 ... this gets a little fuzzy to me. Basically the way I understand it is if you want to upgrade any Golden Tee Fore! to the "complete" version, which gives you ~30 courses from the whole Fore! series, you need a version of that "complete" game on a new hard drive (or one of these mini extension drives), plus some compatible security chip. I admittedly didn't do much digging if you could procure this yourself, but it seemed like someone had found a niche selling these afternoon for almost $200 a pop, so it seemed like this probably was something not easily reproducible.
I'm skipping the specifics, but the above alone is already ~$560 for used hardware. On top of all of this, you'd still need to figure out how to connect the game to the control board you built/ bought separately. I'm sure there's a ton of JAMMA harnesses and related guides, but this wouldn't be cheap.
I relegated myself to emulating the game.
Which game?
If you check the history of the game, you'll see more a bunch of different versions throughout the years. Golden Tee Gold, Golden Tee 2K, Golden Tee Fore!, Golden Tee LIVE, etc. My goal with the project was to be able to play the newest version I could, though the modern games made this materially more tricky. In 2005, Golden Tee LIVE came out which materially solidified the online nature of the game. It also introduced more complicated hardware making it difficult to piece apart and reassemble. Not to mention these online versions required you to "phone home", utilize a subscription, and pretty much indefinitely have an internet connection.
I'm not sure how this would work if you were "pirating" the game, but had original hardware that you had procured all over the internet. Nonetheless, somewhere around 2017, Golden Tee Fore! Complete was successfully dumped and playable in MAME. I'll talk more about this shortly, but at the time, the game was probably one of the most computational expense games to emulate requiring premium hardware.
Emulation with MAME
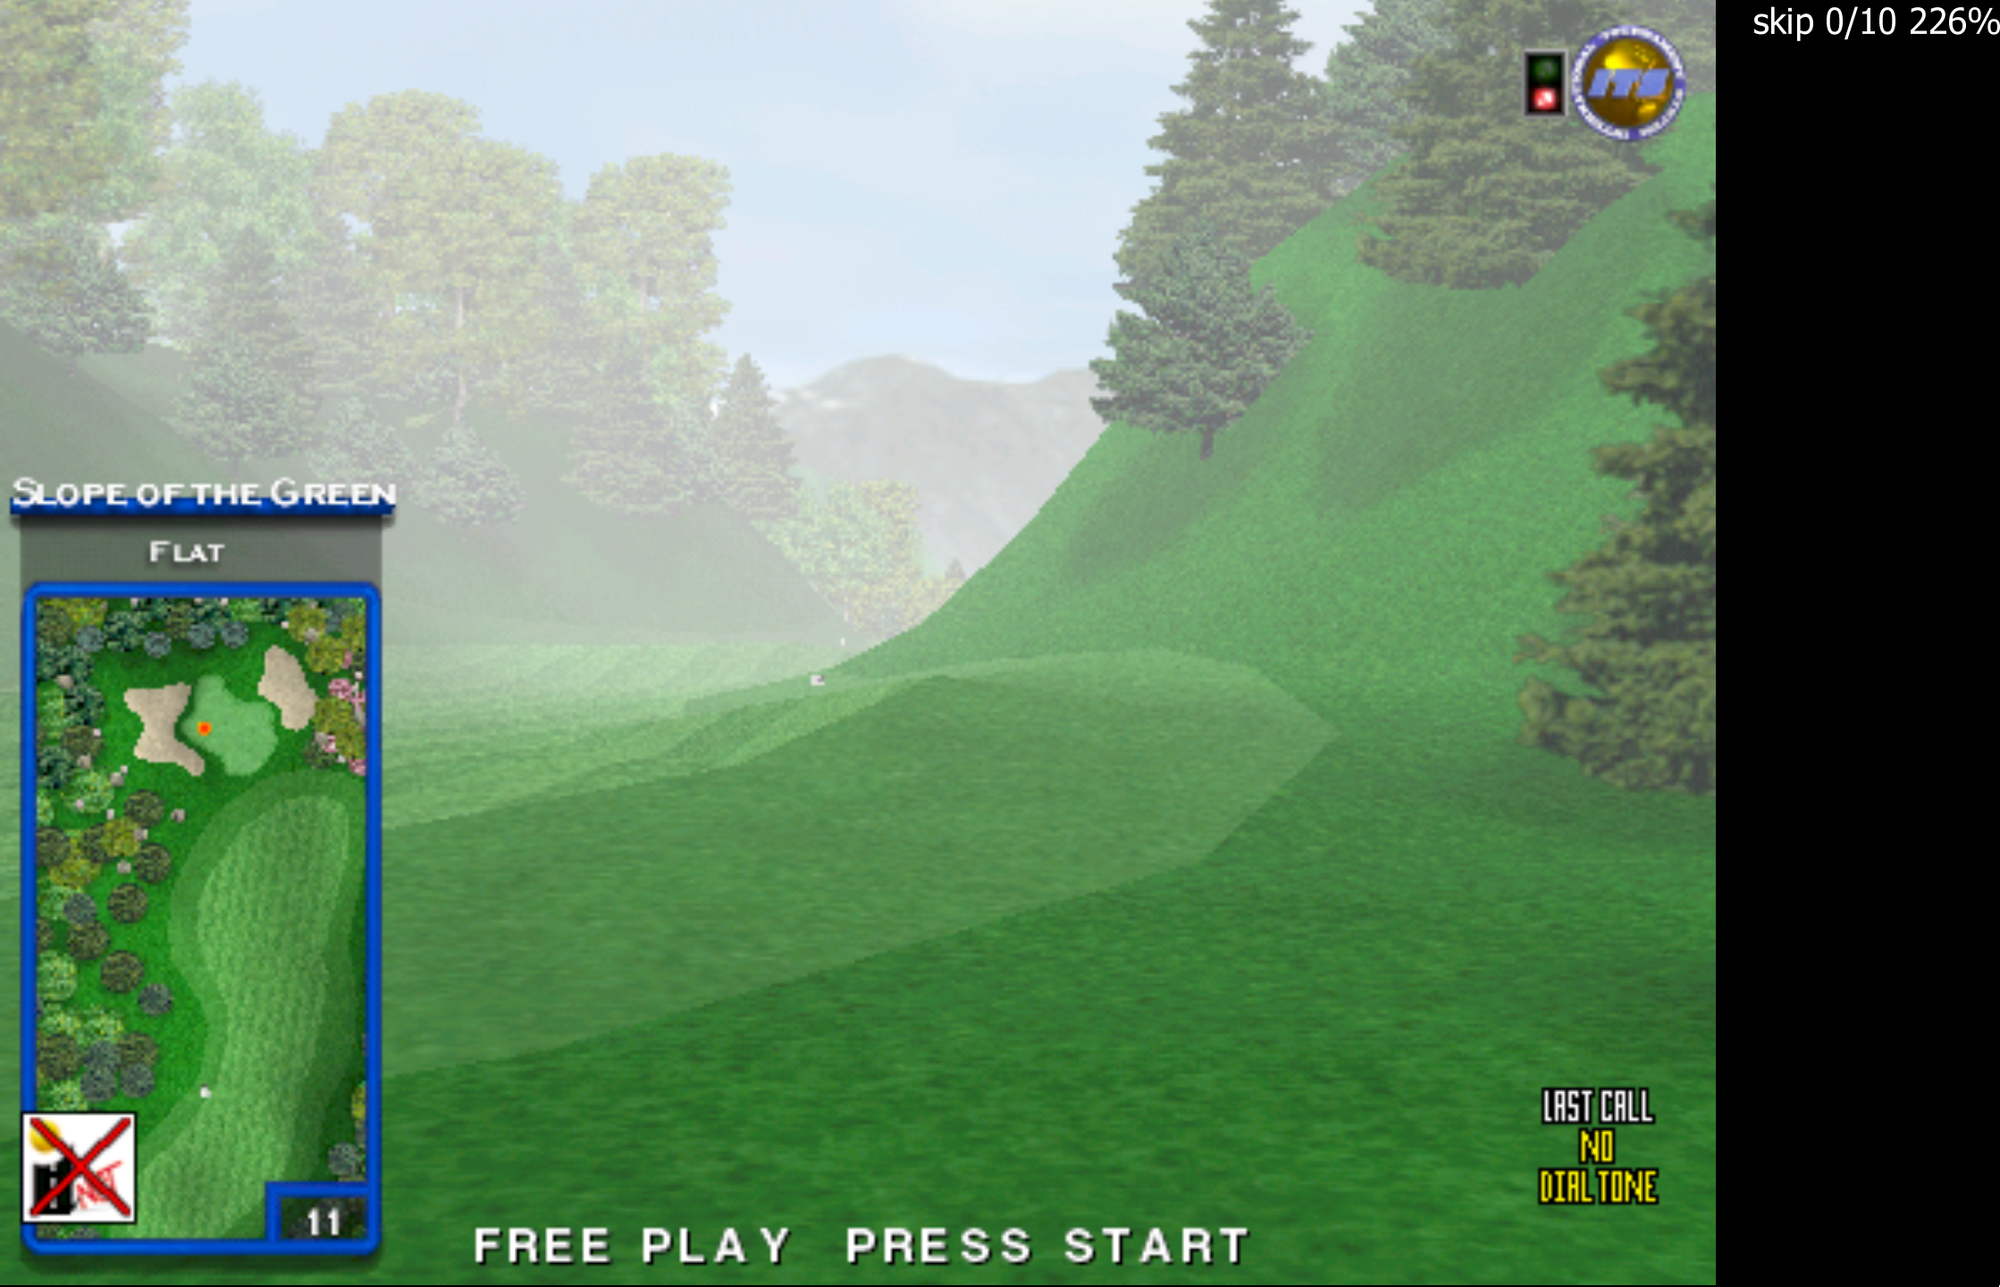
If you've ever played a Gameboy emulator or anything else that emulates an old game console you're vaguely familiar with the concept: original game hardware can be emulated at the expense of hardware limitations. For old games like a Gameboy game, almost any modern device including your smartphone can emulate the game almost perfectly - there's chipset you're trying to emulate isn't as complex as modern games, and your modern hardware dwarfs the computational abilities.
This gets tricky with more modern hardware. Modern, functional emulators for consoles like the PS3/ Xbox/ GameCube are partial at best. I think the sweetspot for emulators rests in the PS2/ Dreamcast era, but I digress.
Nonetheless: the takeaway is the more demanding the game, the better hardware you need on the other end to run it. Golden Tee Fore! represents one of the more hardware-intensive games that folks have tried to emulate. Luckily computers have gotten pretty good, and good hardware has gotten cheaper.
I downloaded MAME .230 and a copy of the game and fired it up. Notwithstanding the terrible controls mapping to a keyboard, the game was playable. On my Ryzen 5600x, the game was running at more than double the framerate needed! This is far from scientific but I knew I was in the right place. Let's get down to business:
CPU
The name of the game here is cost vs value. I knew I was going to build a standalone PC to stay in the cabinet indefinitely. Given that all this computer will ever do is play Golden Tee, getting too powerful a CPU would be a waste of money, but not powerful enough would be a waste.
MAMEUI Benchmarks was an invaluable starting place: http://www.mameui.info/Bench.htm
At the time, the latest version of MAME for me was .230, but even with newer versions, results looked negligible:

The way to read this is that each score represents a percentage the game was able to run versus baseline. So 100% means the game ran, on average, at exactly 100% of the speed it was intended to run at.
So for example, you can see that "dkong" (Donkey Kong) emulates somewhere in the ~4000% percent range. You'd never play the game at 4000% speed, but it demonstrates on this hardware (an i7-6700k in this case), that the game runs with more than enough headroom.
In our case, we're interested in "gtfore06" at the bottom there. Looks like somewhat regardless of MAME version, the game runs somewhere around 210% on an i7 6700K, a 2015 pretty high end processor (~$350). This percentage is, of course, an average so I'd venture the real "playable" rate is probably some fraction of this score, but there's a good buffer in there that the game probably runs pretty well with this hardware. This is corroborated by a MAME Dev suggesting you pretty much need a 4GhZ Core i7:

My thought process at this point is if all these MAME recommends this ~2015 $300 processor, maybe I can get a modern ~2021 processor that performs the same way. I narrowed my search on CPUMark and sure enough, a Q1 2021 i3-10105 was benchmarked as almost identical to a 2015 i7-6700K. Crazy! The bonus: an i3 is a lower wattage CPU so it can be used in smaller form factors with less cooling, and it's a fraction of the cost. In my case, $90 (regularly around $120, I got it on sale). Don't confuse the 10105 with the 10105F - the latter of which has no integrated graphics!

Case/ Motherboard/ Power Supply
I went back and forth with this decision for awhile. There's tons of great MicroATX cases out there I could pick up for a $100. Throw in a cheap motherboard, and a simple power supply and I could have the a barebones PC for maybe $300?
While I'm digging around for the right case + motherboard combo, I stumble upon barebones PC. I hadn't thought much about it, but little devices like an Intel NUC might not be a bad play. After many rounds of reviews, my unequivocal recommendation: ASRock DeskMini H470

This case has everything. It's small, supports LGA1200 up to 65W TDP - the exact specs of my i3-10105, it includes a power supply, has a motherboard already, and space for an NVME or SSD drive. And at $190, it's a great deal versus buying each piece yourself!
Hard Drive/ RAM
I wouldn't overthink this part. I picked up the cheapest NVME I could find. I figured an SSD or NVME would render the best performance and I didn't need more than probably ~25gb for the full OS plus game files. The smallest drive I could find was a 256gb - oh well, more than I need.
For RAM, the difference between a 4GB stick and an 8GB stick was literally a few dollars. Might as well spend a bit more here and make sure there truly aren't any bottlenecks.
All in PC Costs
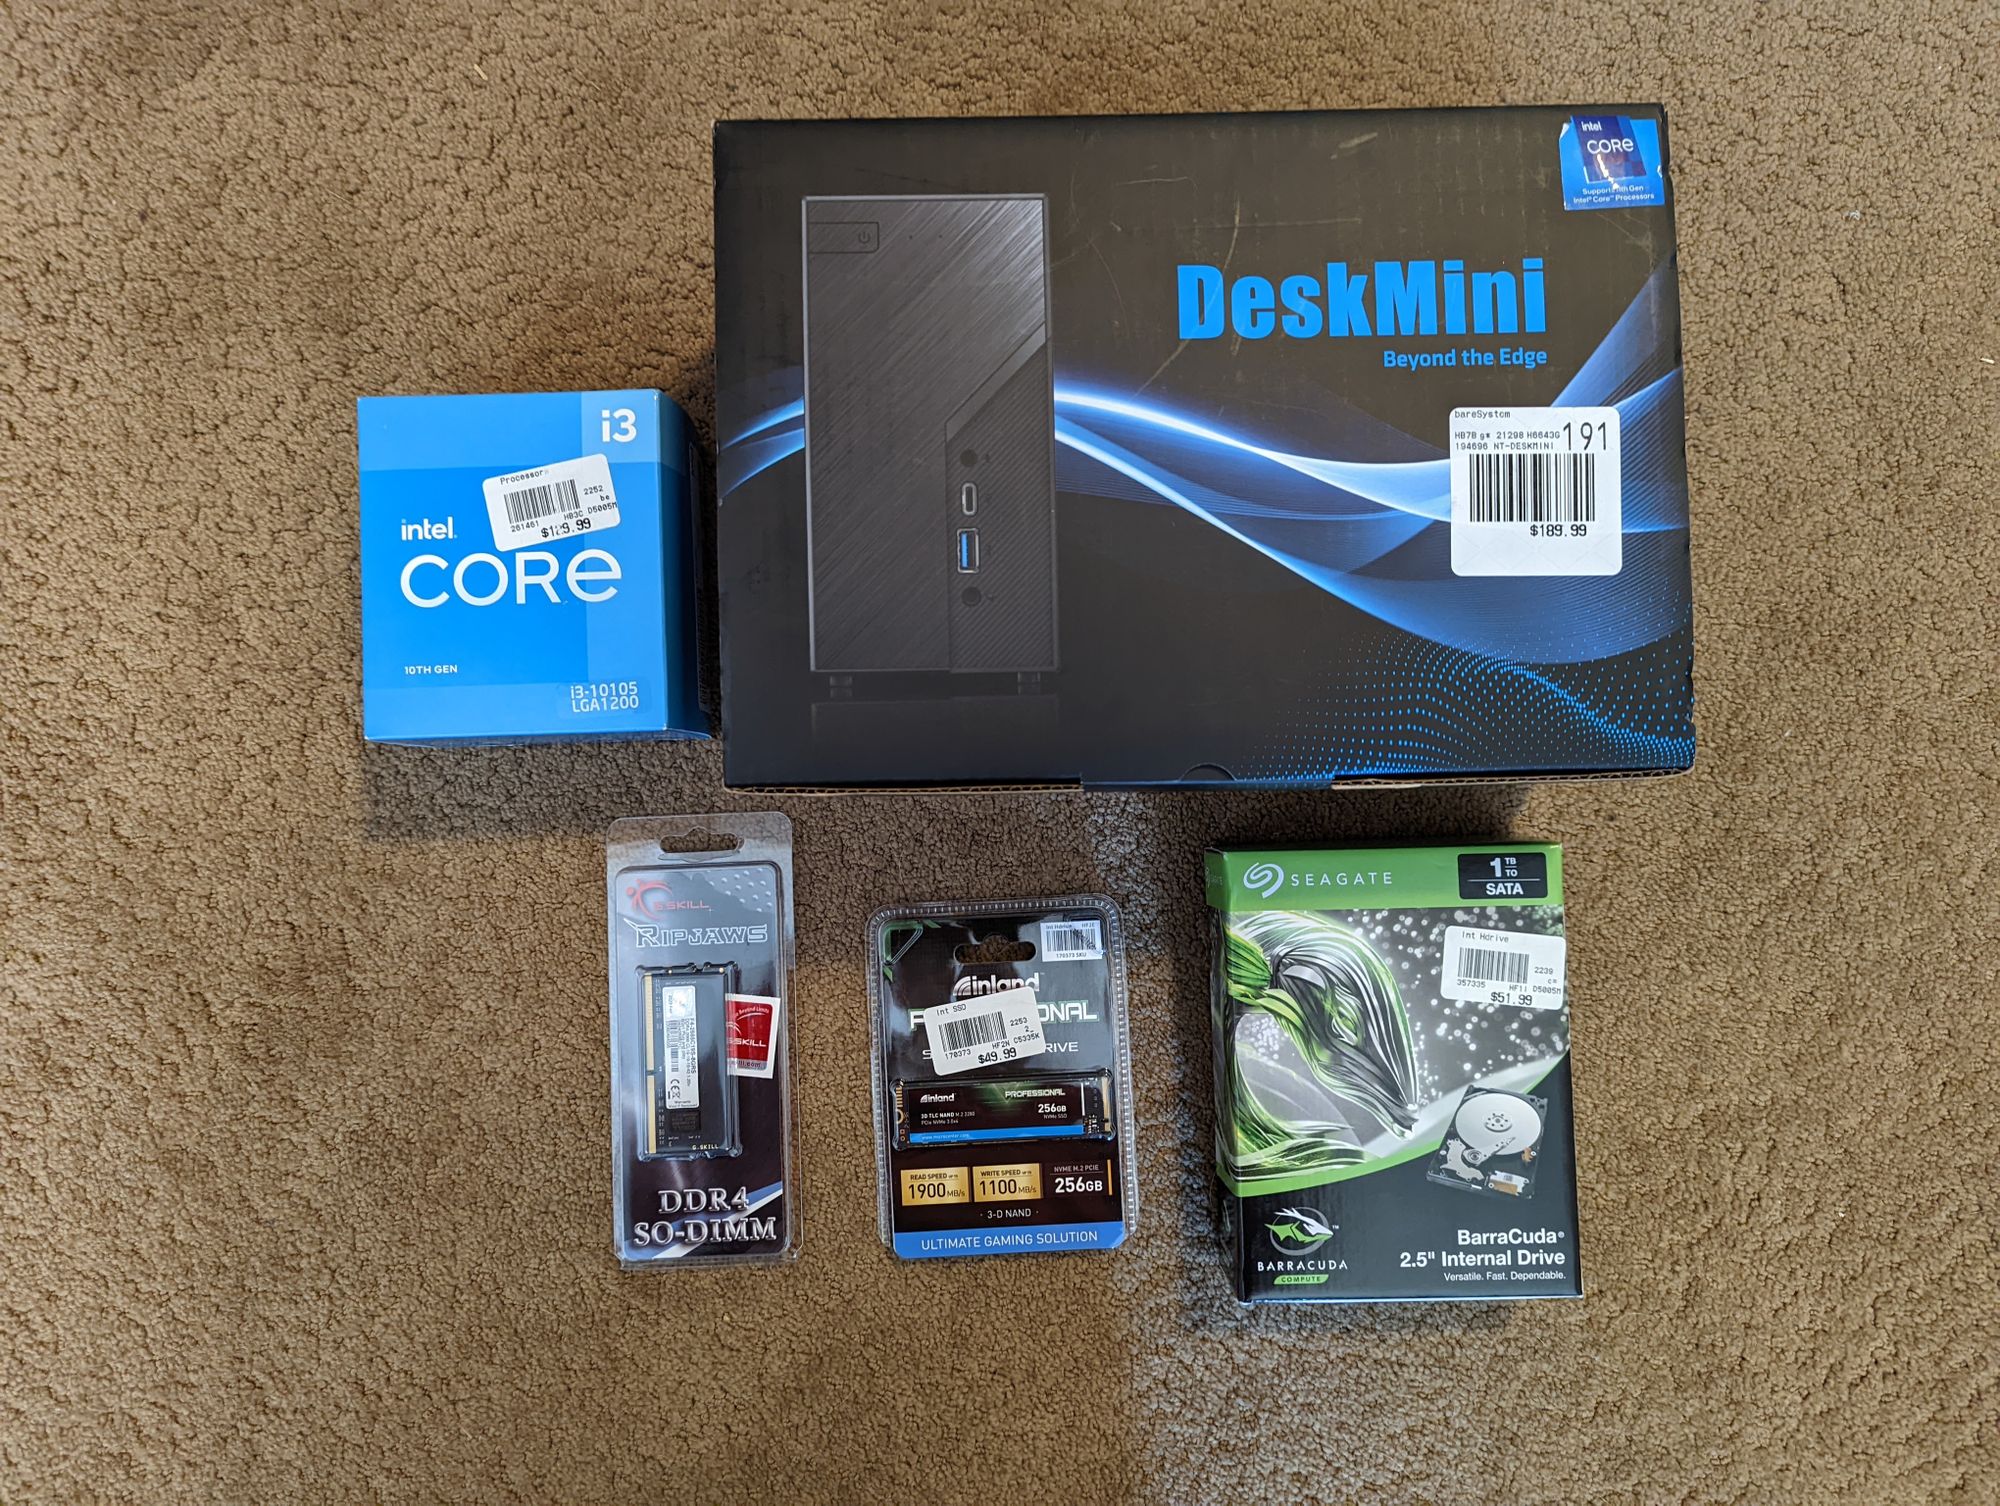
- $190 ASROCK DeskMini
- $90 Intel Core i3-10105 (got it onsale! Don't confuse with 10105F)
- $35 8GB RAM stick
- $32 NVME drive
= ~$347+ tax
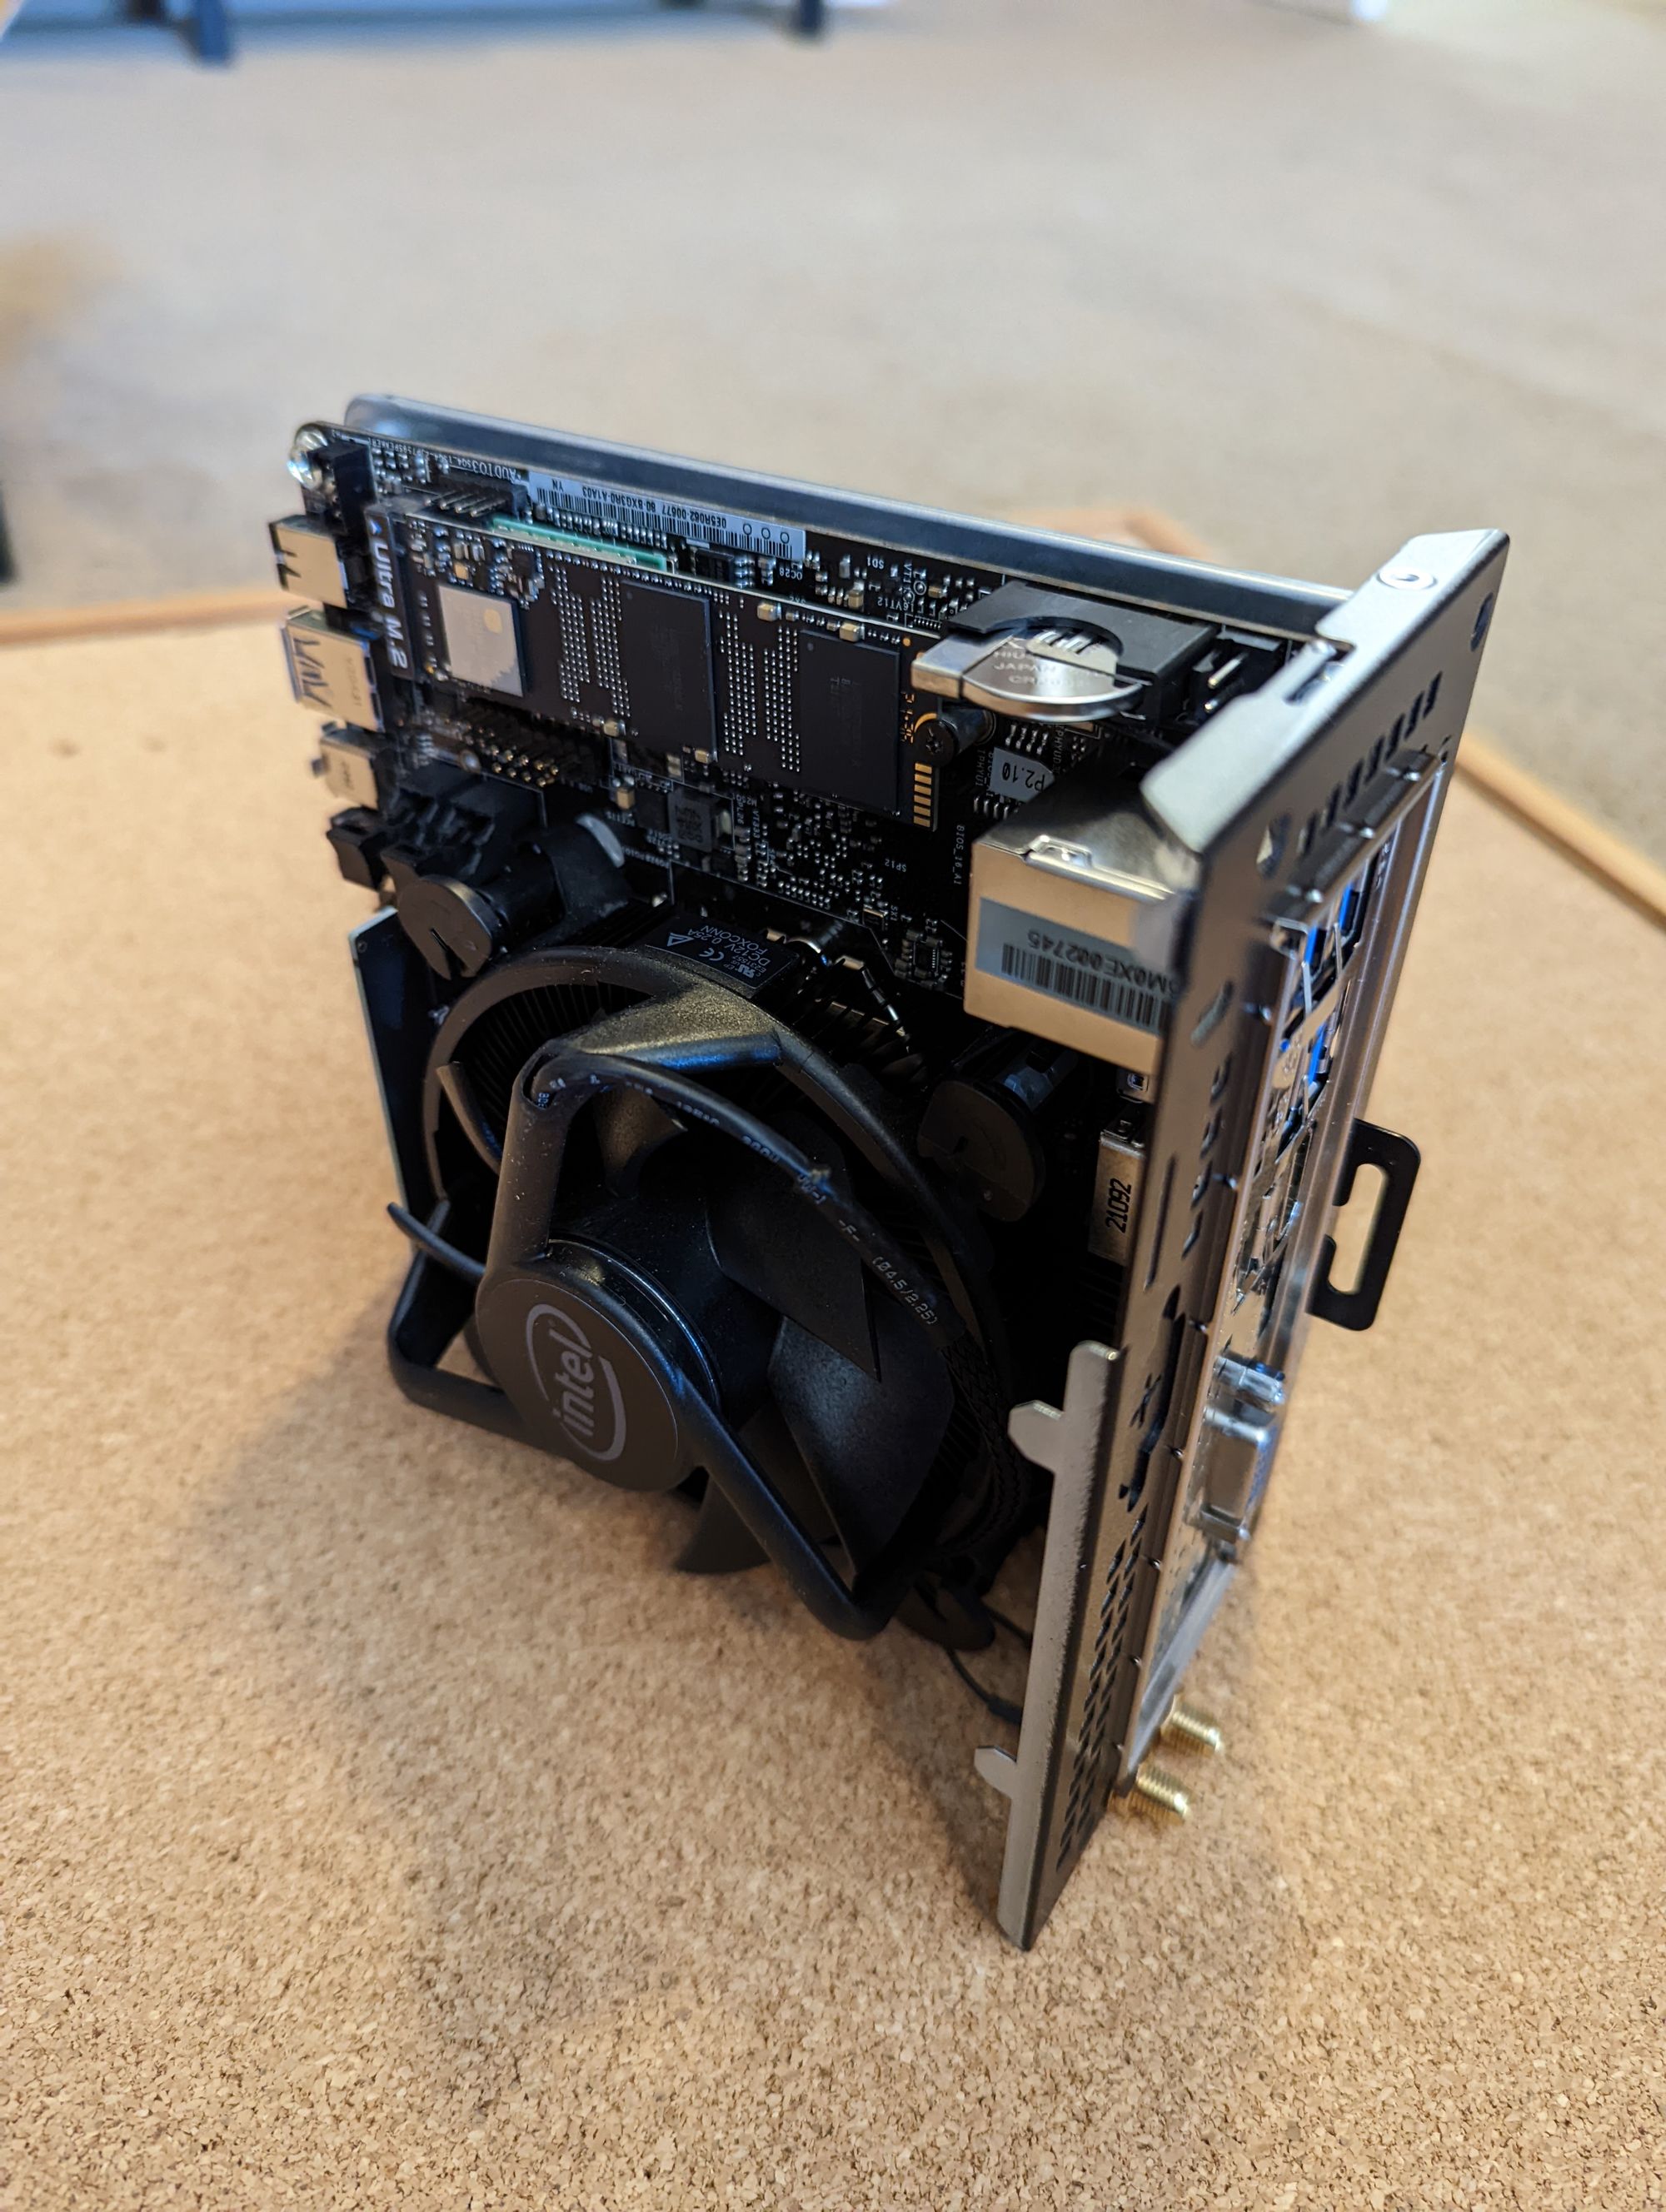
And that's it. Really simple to assemble.
What OS to use?
Honestly this is a personal preference question. I had looked at many of the various "loaders" that exist for MAME as a way to launch the game elegantly when firing up the computer. LaunchBox, HyperSpin, GameEX, RetroFE, etc.
Some are Windows, some are Linux. At the end of the day - I decided I didn't need this. I was intending to play one game only, ever, on this PC so installing a specific front-end to "launch" the game was unnecessary. I figure I can just write a script to autoboot MAME and go straight into the game, no fancy launcher needed.
So the name of the game then becomes optimization. I've had poor experiences with Windows breaking down over time, and I really didn't want to deal with licensing, even if I picked some old hacked Windows XP build. It was way simpler for me to just pick a Linux build.
I had worked in Ubuntu in the past and always had a good experience with it. Easy enough... except... what makes Ubuntu powerful is GNOME, it's desktop environment. Back to my original argument - overkill. What's the lightest weight OS I can run (that I'm familiar with)?

Enter Lubuntu. Basically "lightweight-Ubuntu". Download and install with Etcher and we're ready to go.
Running Golden Tee in MAME
First off, I'm not going to walk through installing MAME. There's tons of guides around, so I'd encourage you to follow any you find, or just reference the official site.
In terms of getting Golden Tee (or any other game) running in MAME, that process is well documented as well, but I'll give you the high level.
You need two things:
- golf_fore_complete_v6.00.01.chd
- iteagle.zip
Think of the CHD as the "game files". The file should be somewhere near 1GB. ITEagle is the BIOS used to run the game. It's a small file. Google is your friend.
If you have a stock MAME install, the easiest way to do this is put the CHD in a folder called "gtfore06", and iteagle.zip in the "roms" directory.


And when you launch MAME, you should see the game:
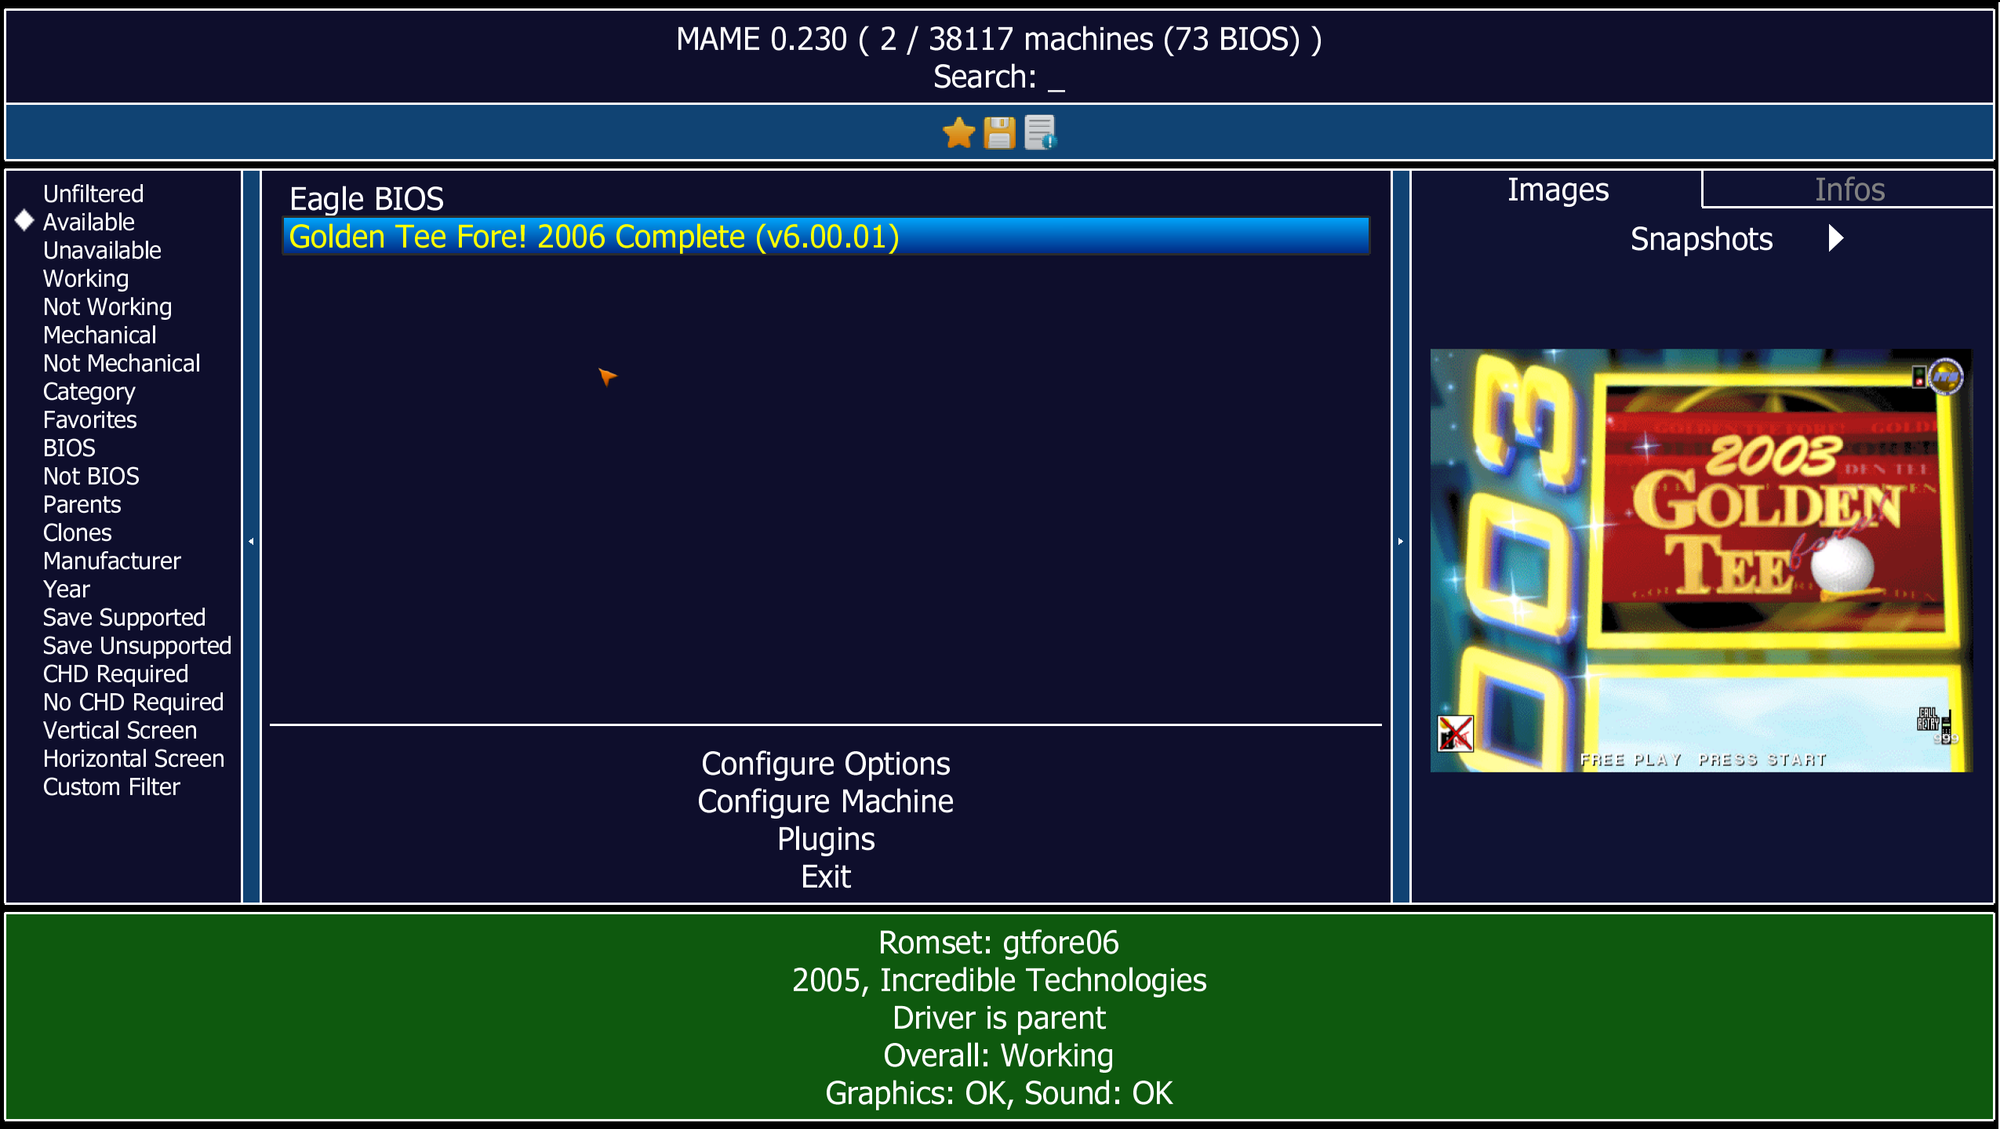
And if you launch the game immediately, you might see a warning like this:
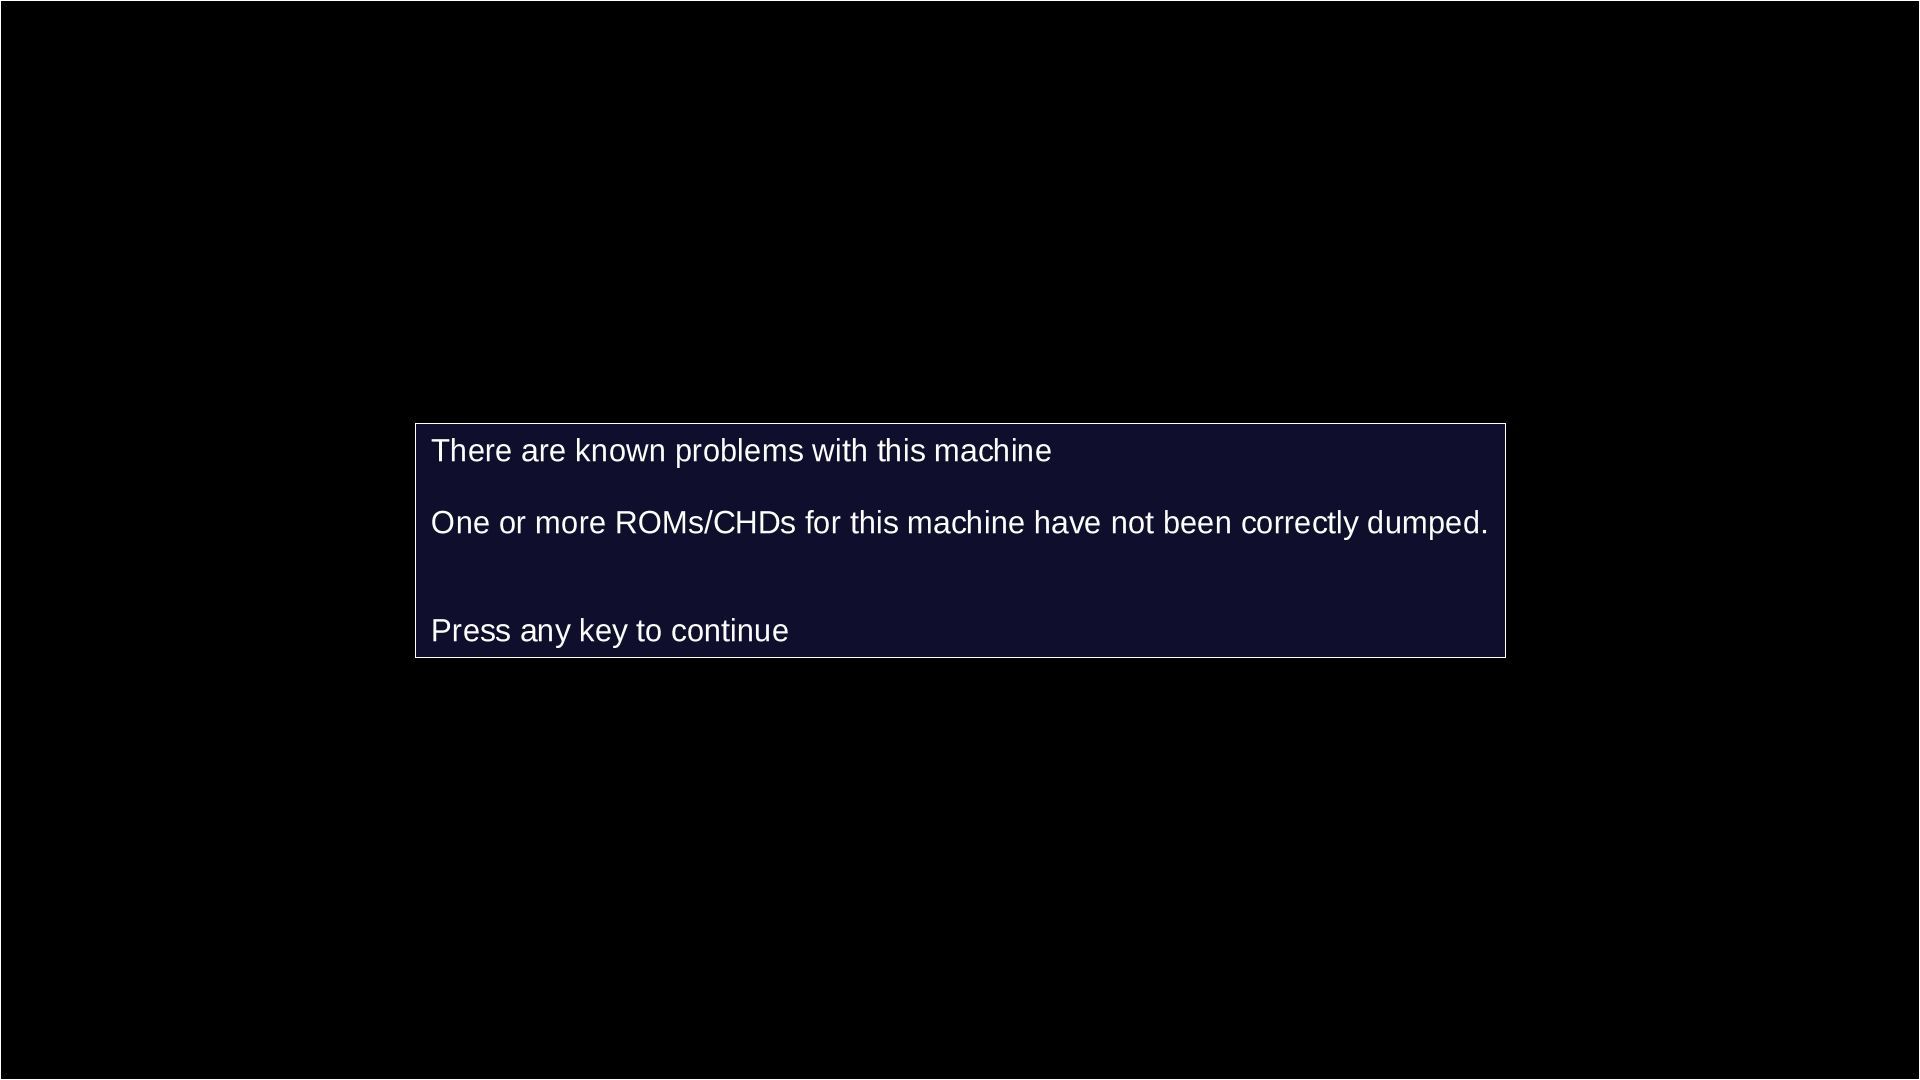
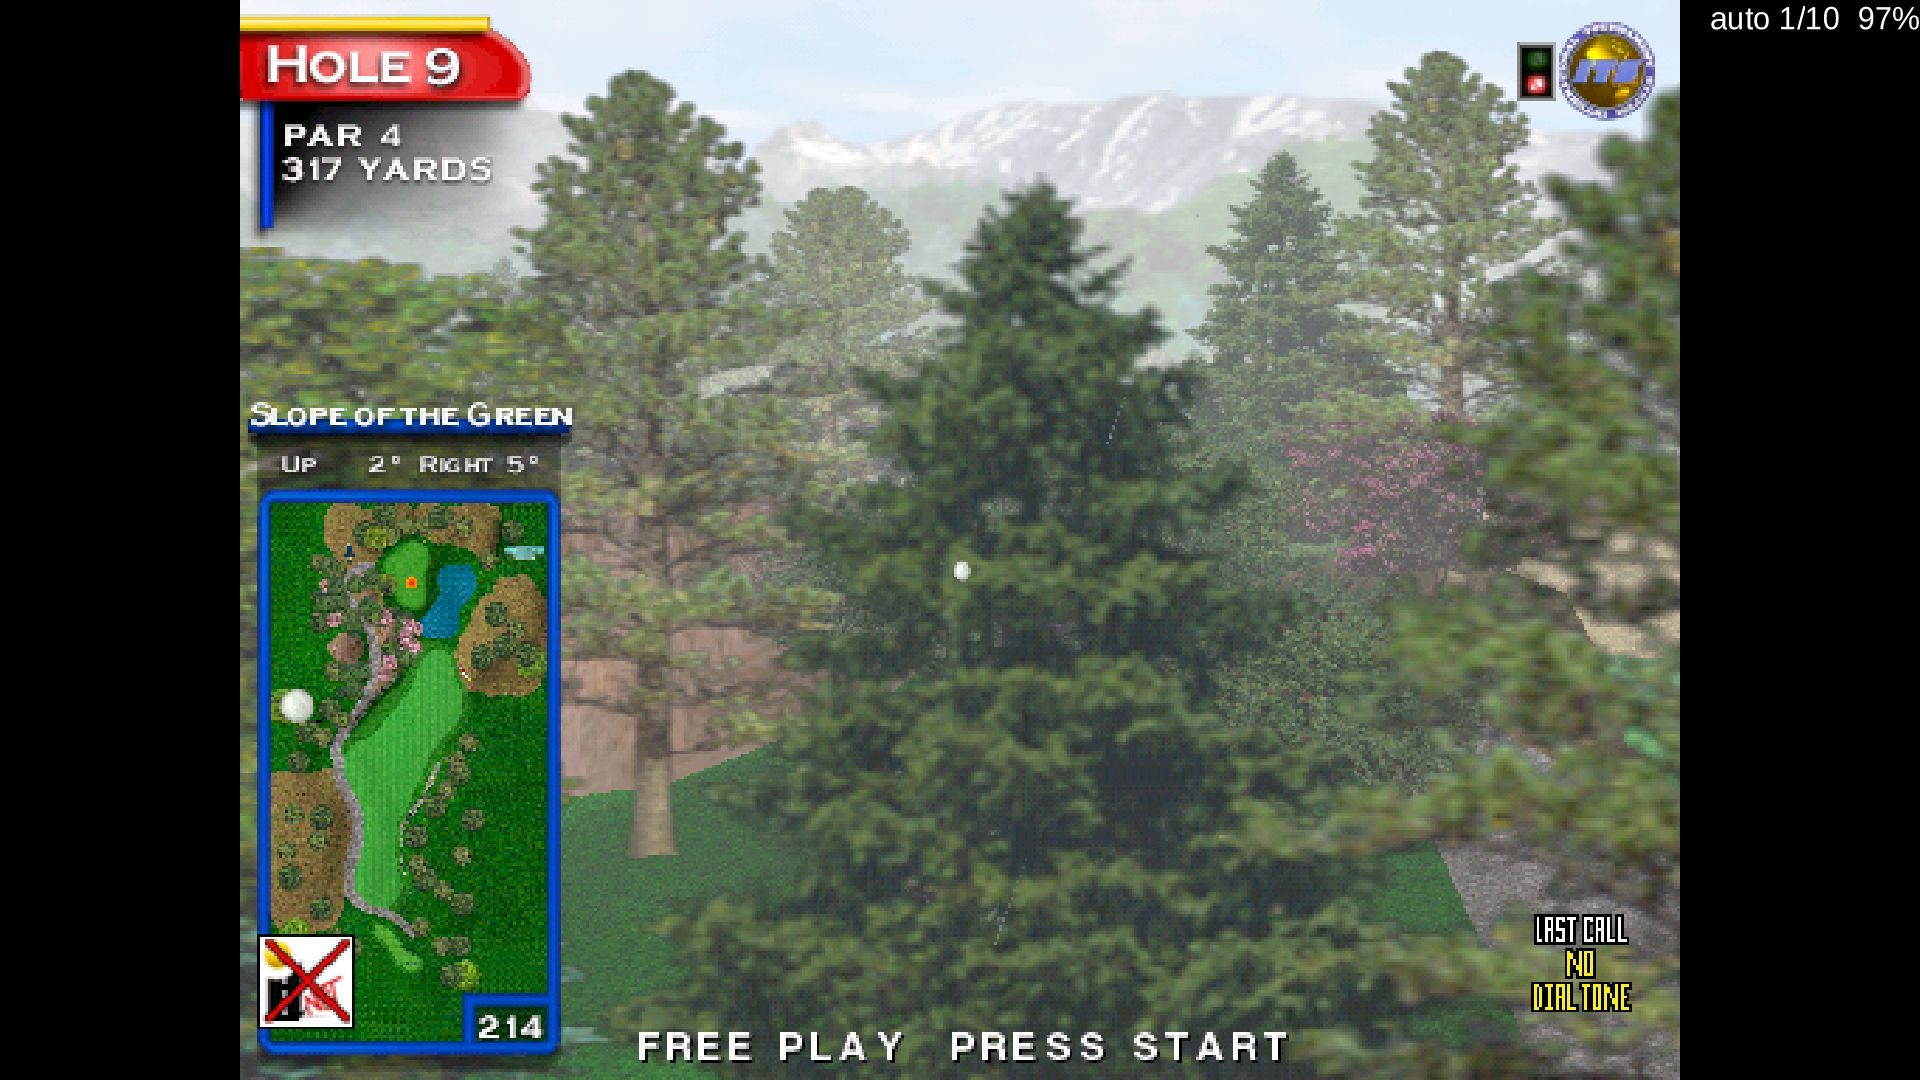
Don't worry, it's completely harmless. With the game now running on the hardware I intended to run it in, I grabbed a screengrab of the emulation speed while at the menu screen. This screen simulates a number of different shots and is a realistic representation of the gameplay. In my case, the game hovered somewhere between 80% and 150% emulation speed, only dipping when I experienced heavy shrubbery or trees that likely required a little more horsepower to render. In this case, a mid-air shot was being rendered at 97% of the expected framerate. I'd say this was a pretty good cost optimization!
Anyway, there's a few things you'll need to go in order to get moving:
Enable mouse as an input
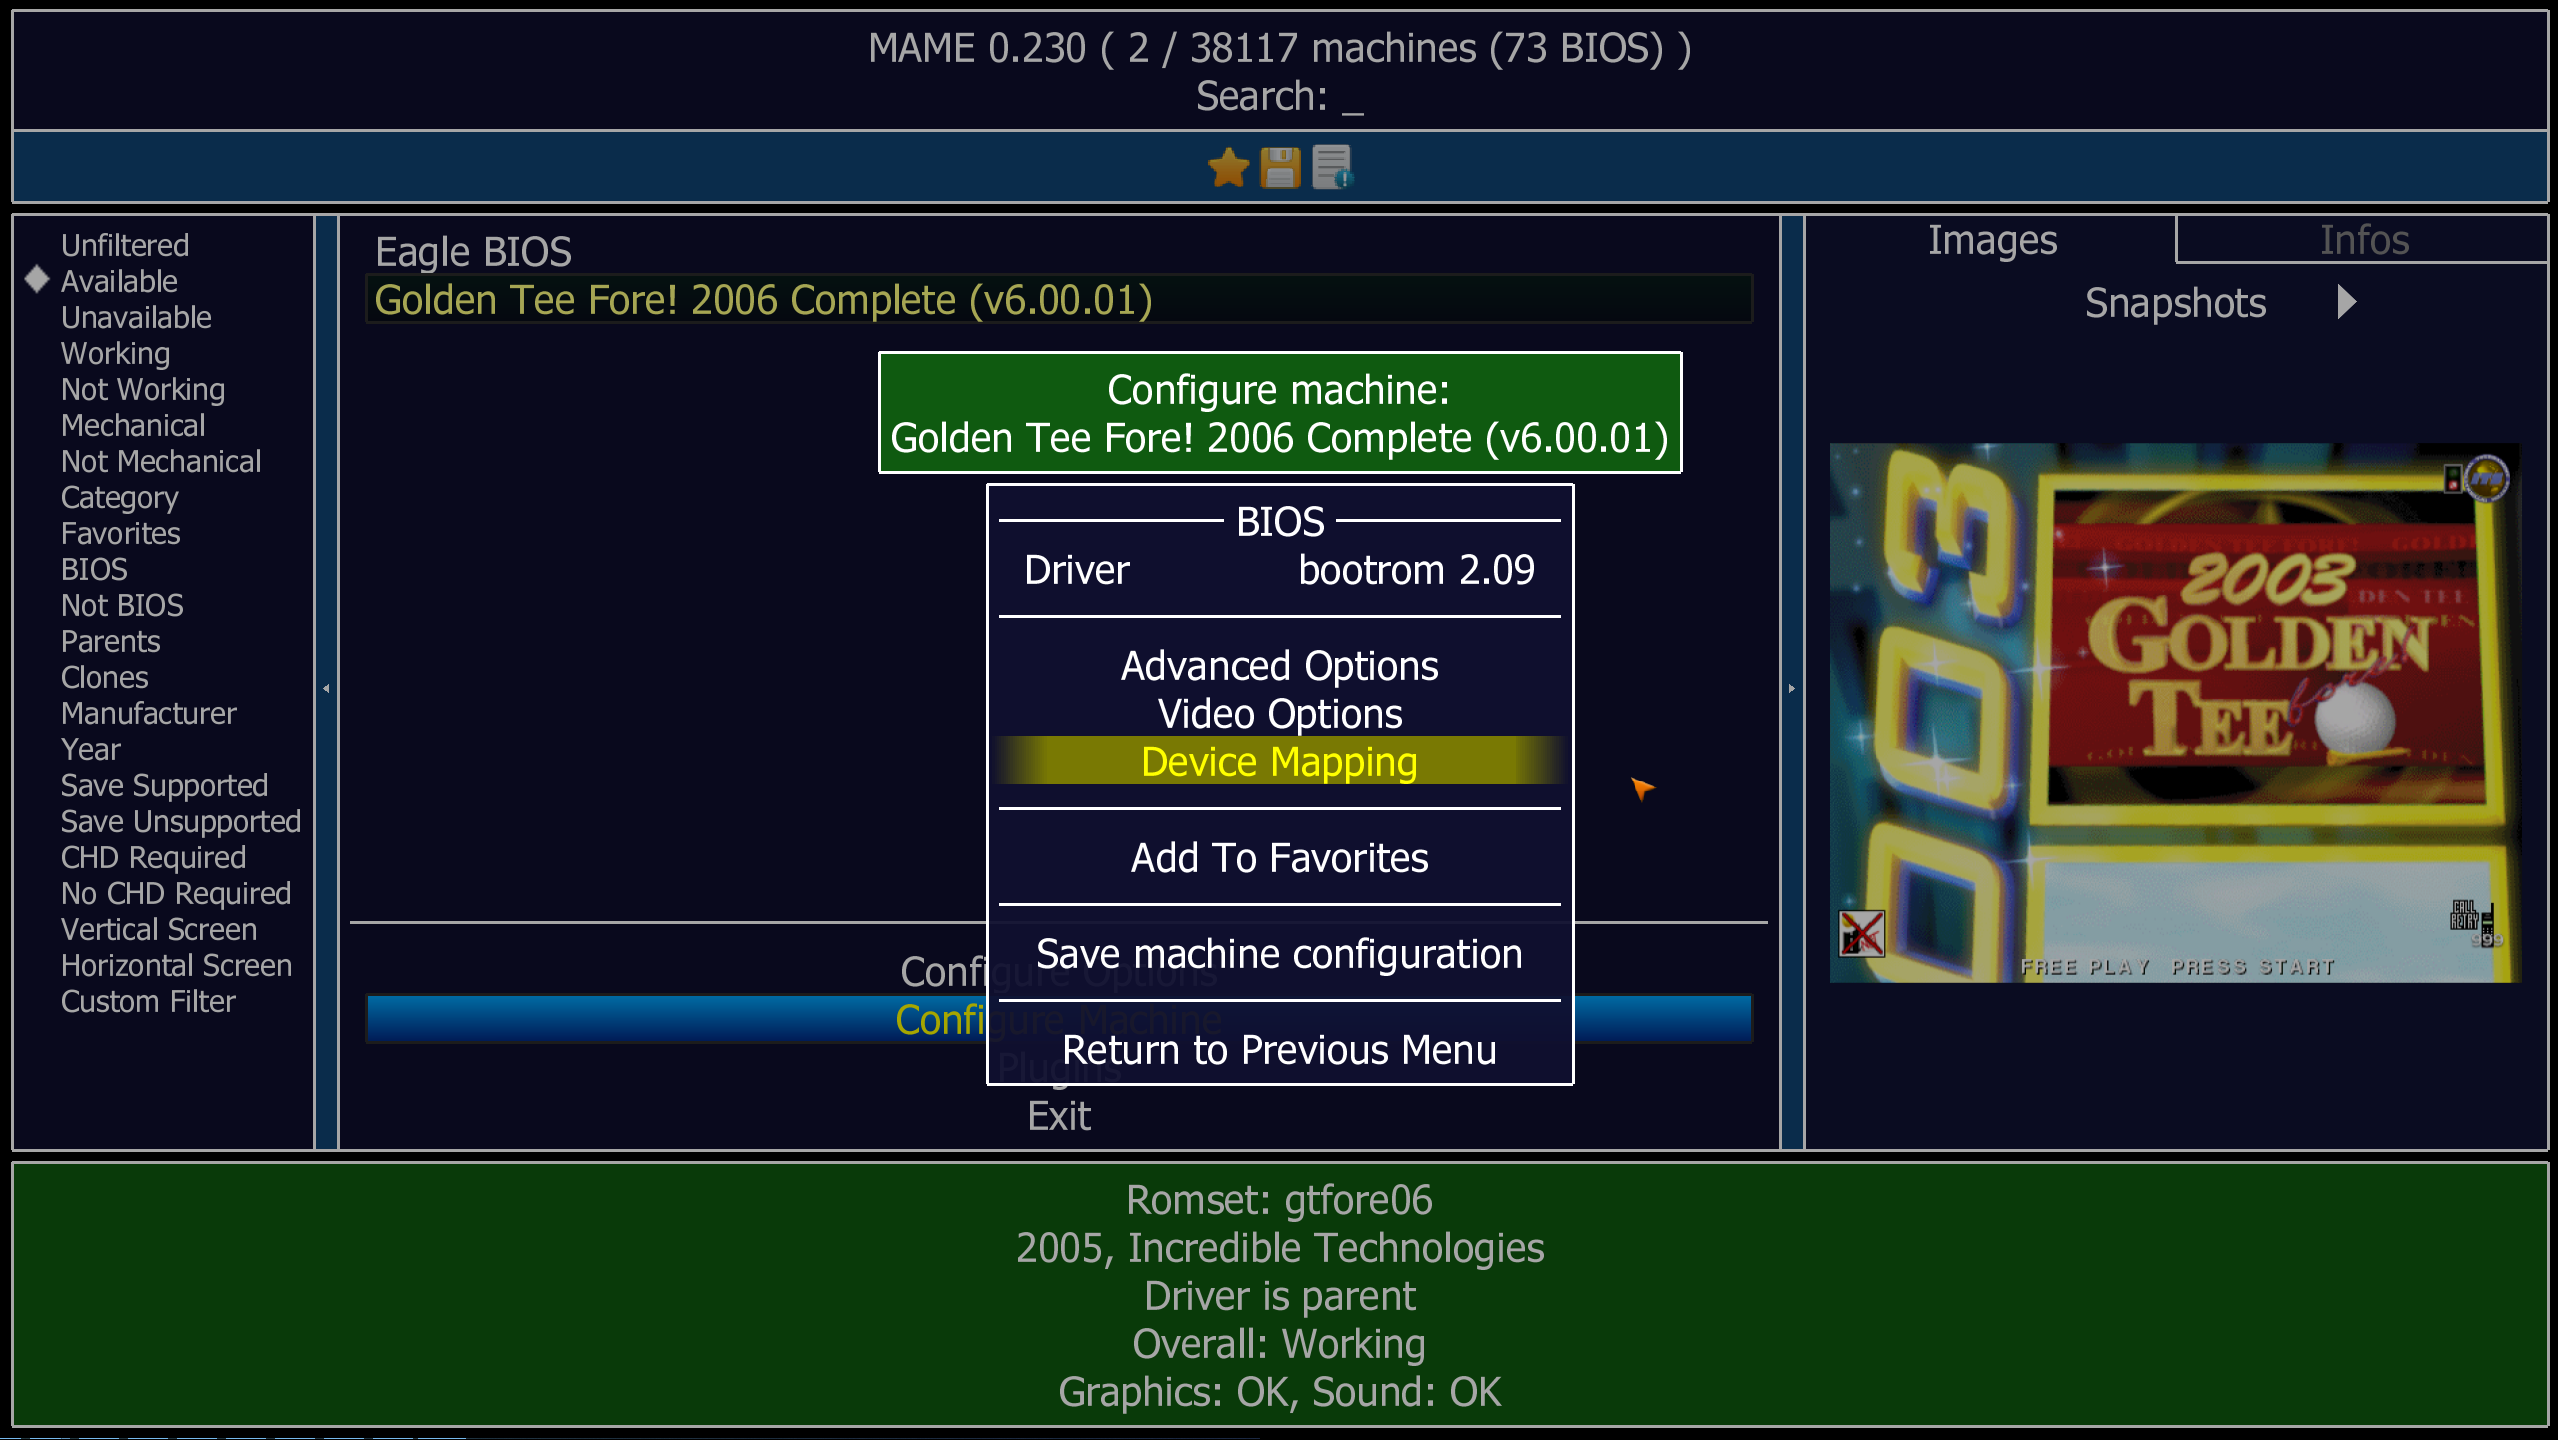
From the main screen of MAME, select Configure Machine then Device Mapping:
Then change the Trackball Device Assignment to mouse. In my case, the trackball I'm using is the original SuzoHapp trackball with built-in USB encoder. In Lunbutu (and I suspect Windows as well), this means it gets treated as a mouse. This is perfect for our use case, all we need to do is discern X/Y movements.
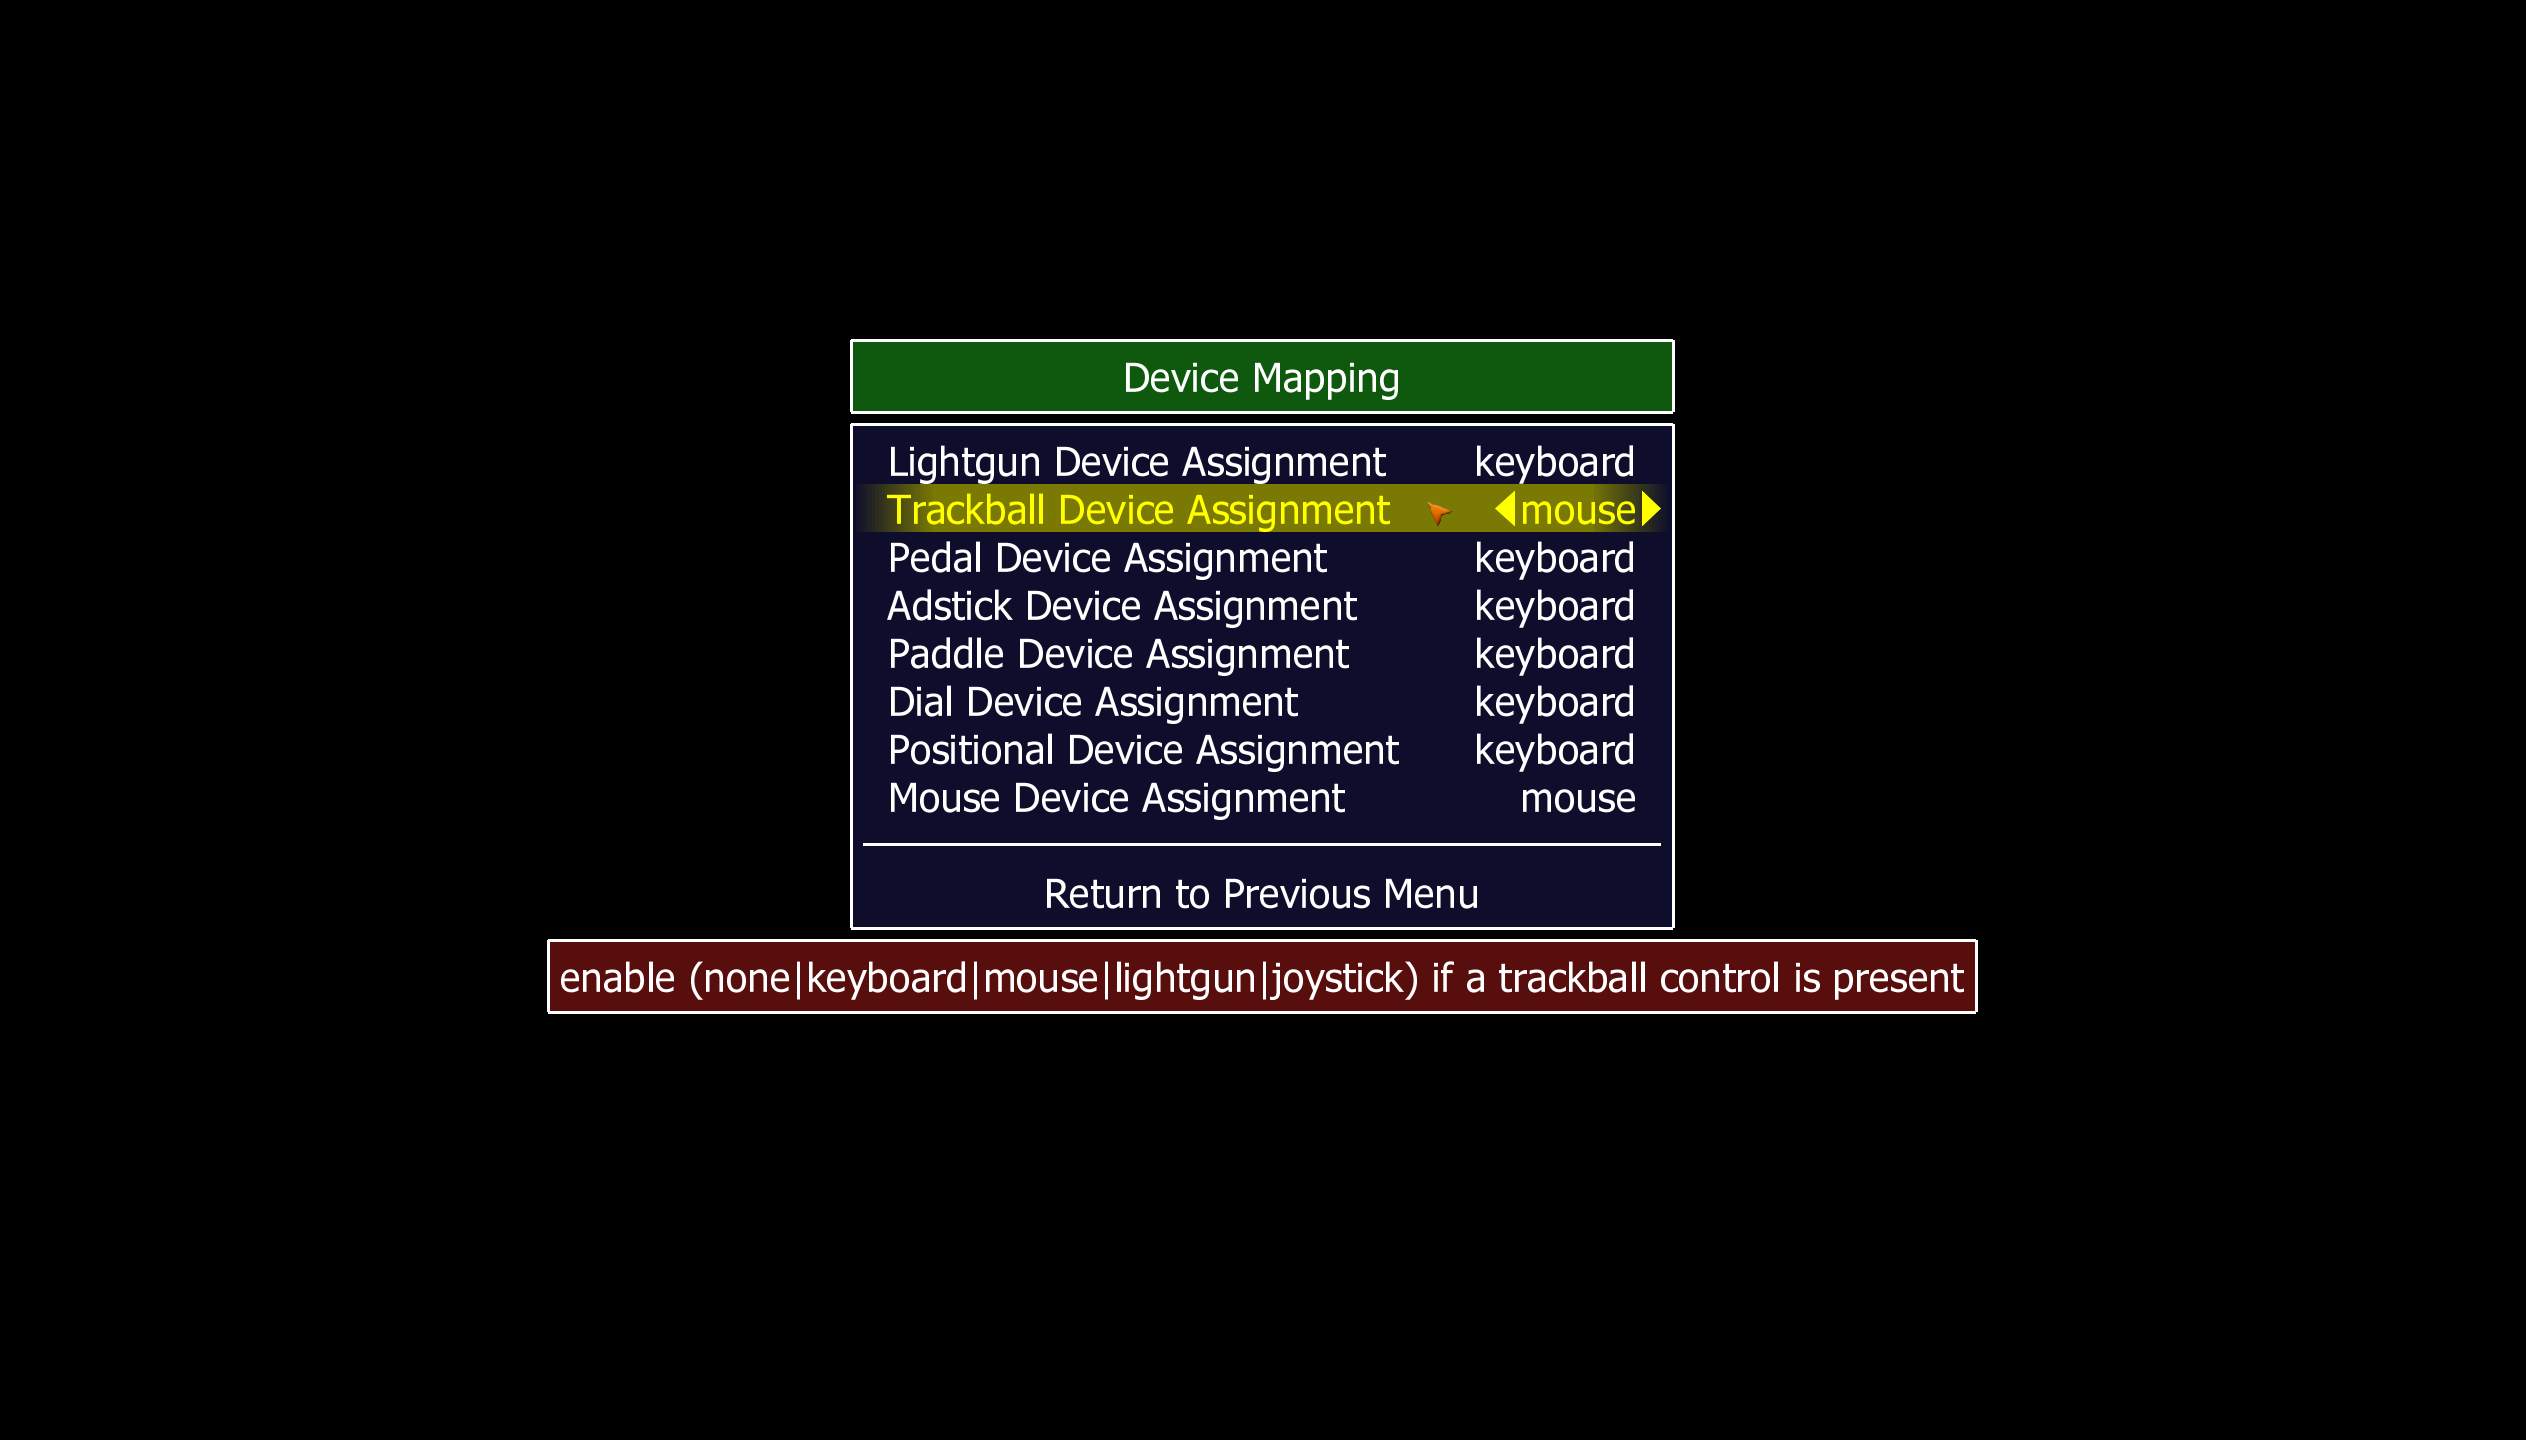
Don't forgot to hit "Save" on the following screen. In your MAME root directly, you'll see a new gtfore06.ini which tracks all the settings related to this machine. Another day I'll explore this and see what else I can optimize for. For now, all I care is that I can use my trackball.
Map Buttons
Next up, let's remap the game controls to our control panel. If you built your control panel in the manner I described in Part 1, and my build guide...
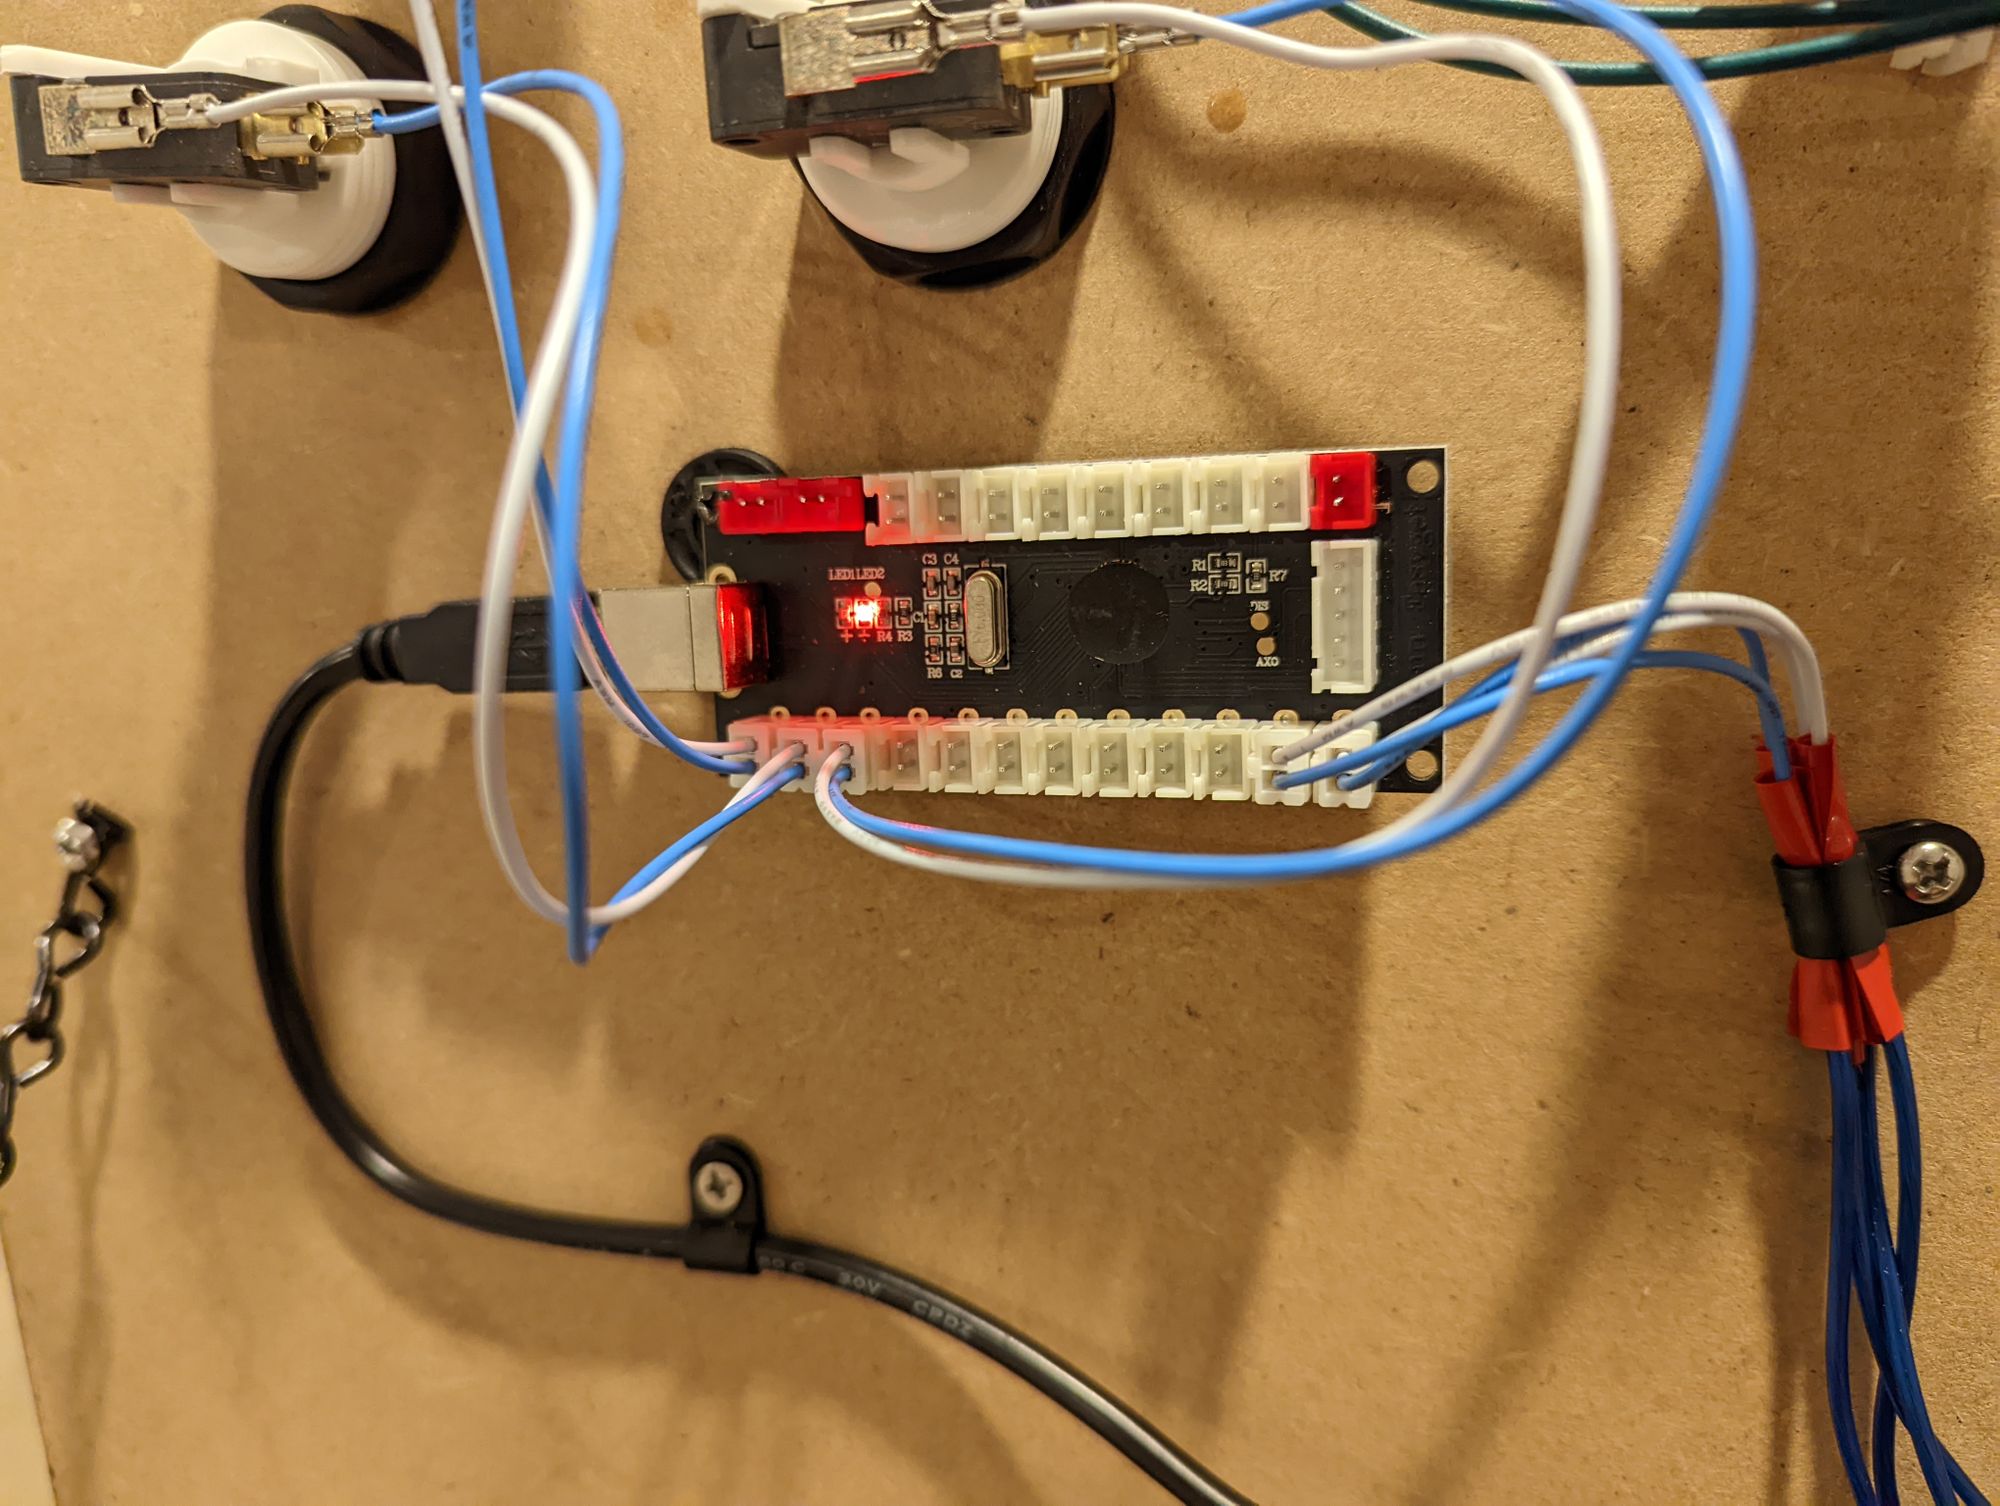
Then your buttons are likely mapped into some sort of encoder that treats your buttons almost as a mini-keyboard type input:
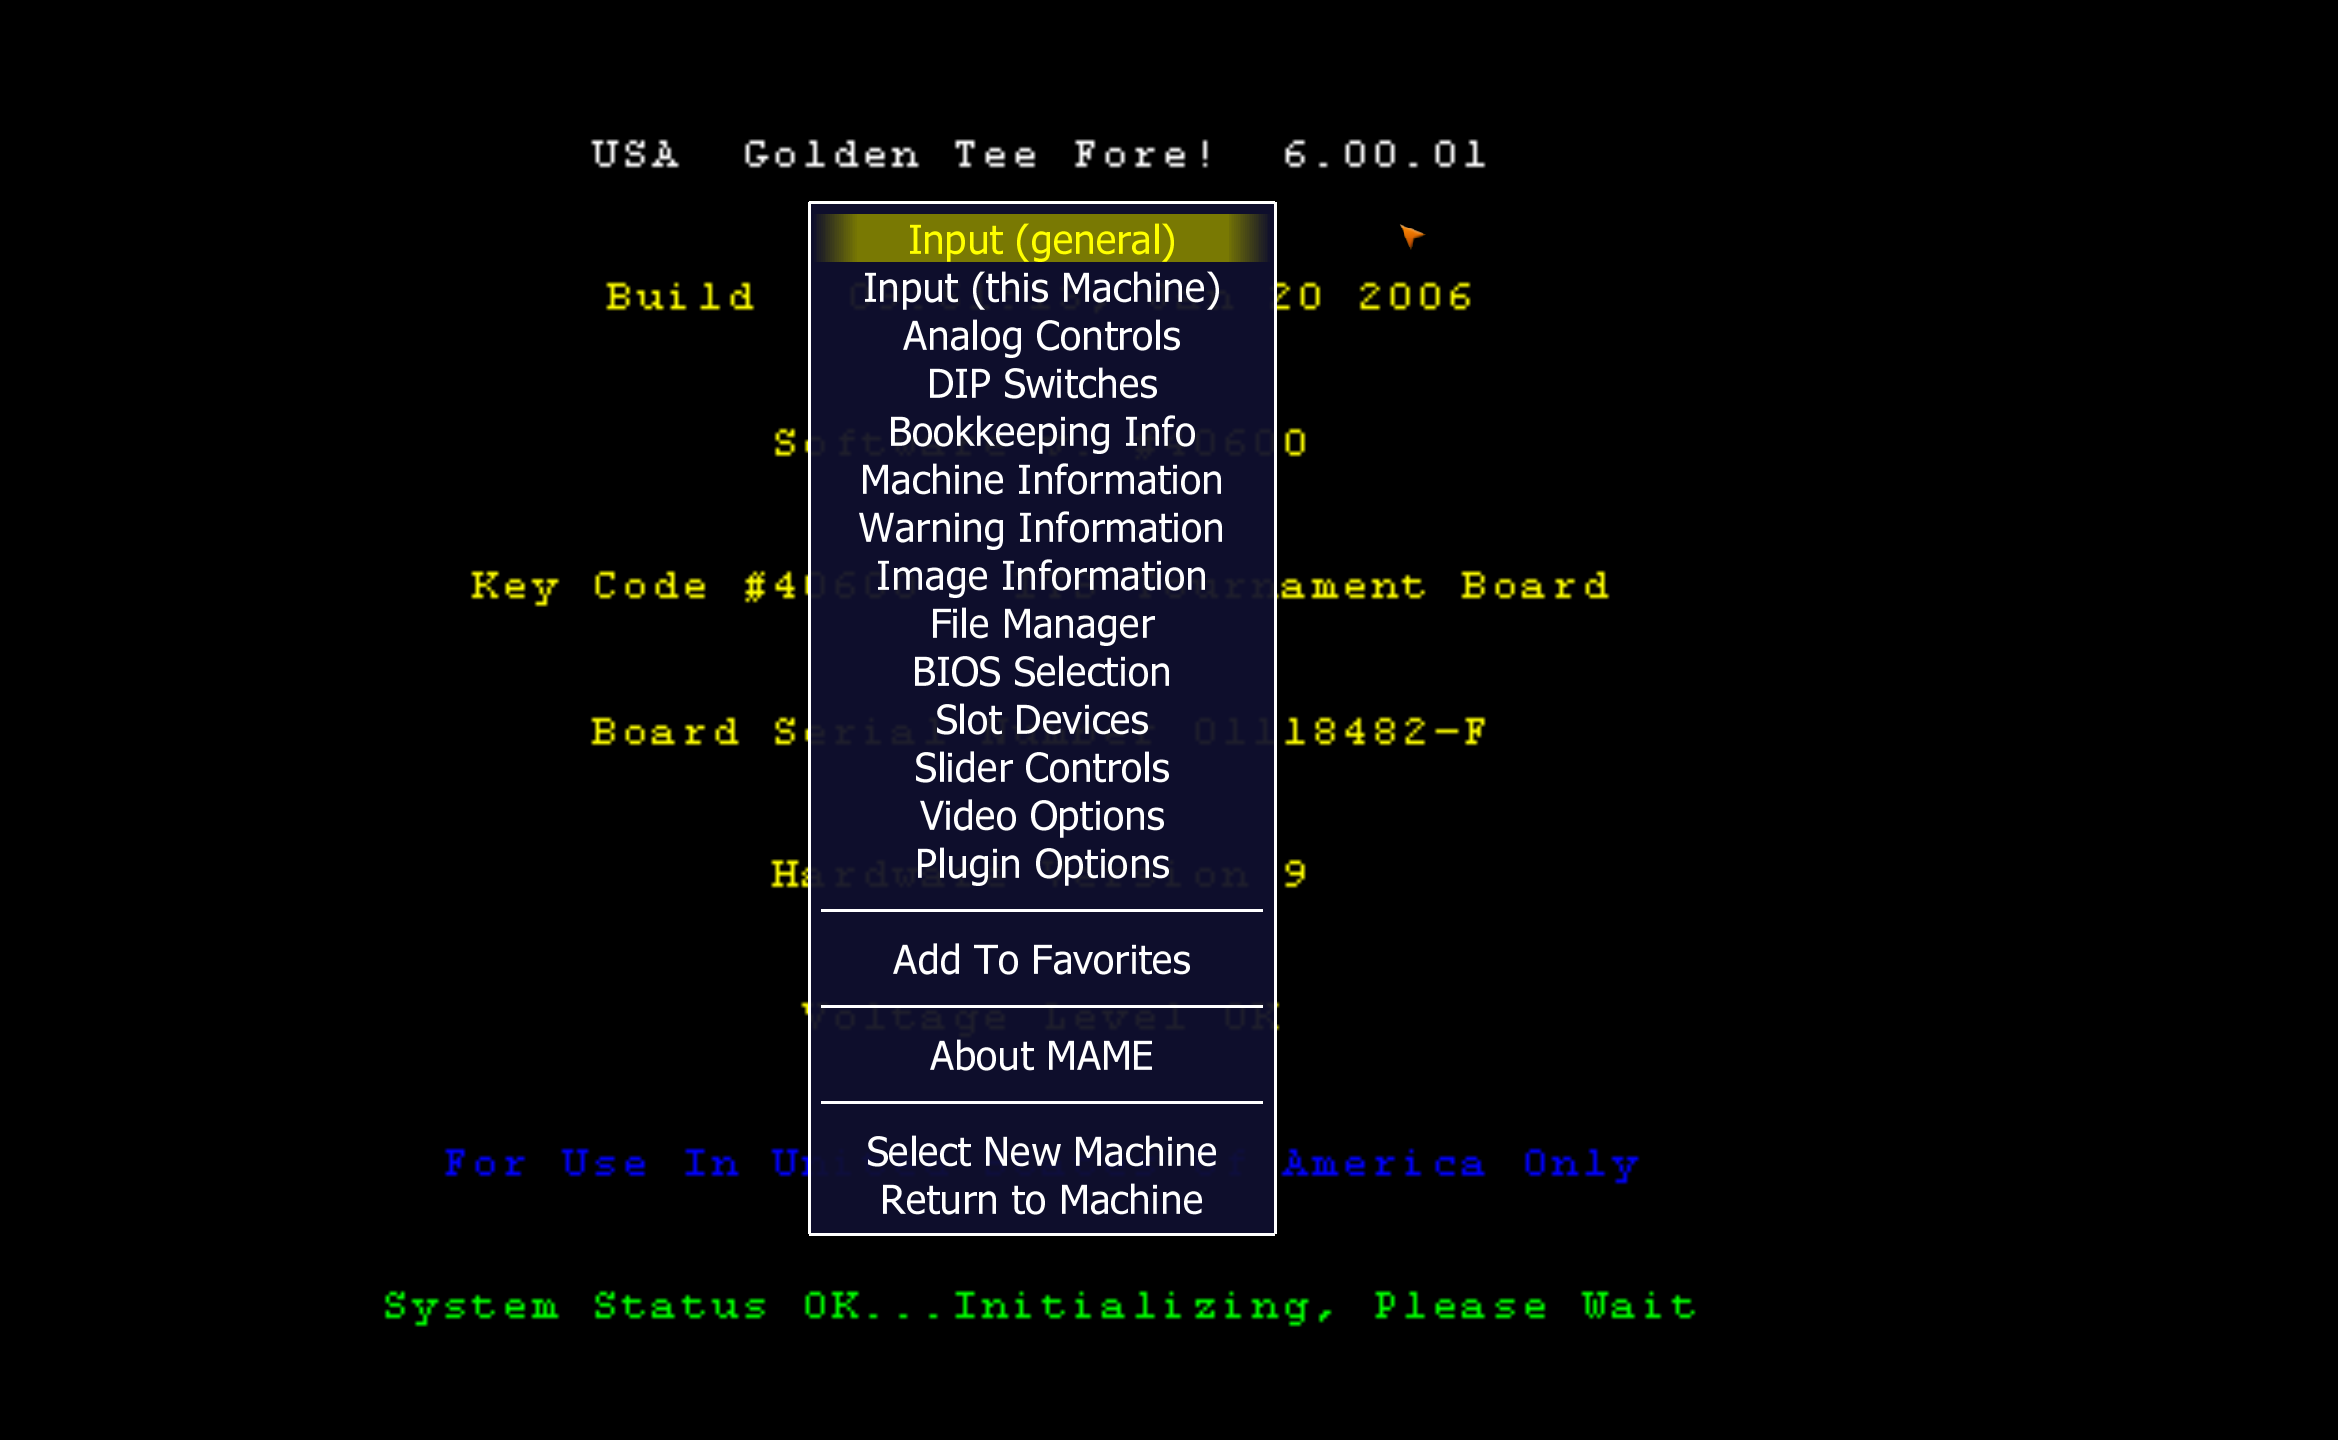
To change the controls, we need to launch the game and get to MAME's options for this machine again. In my case, Tab on my keyboard got me to this screen by default. From here, select Input (this Machine).
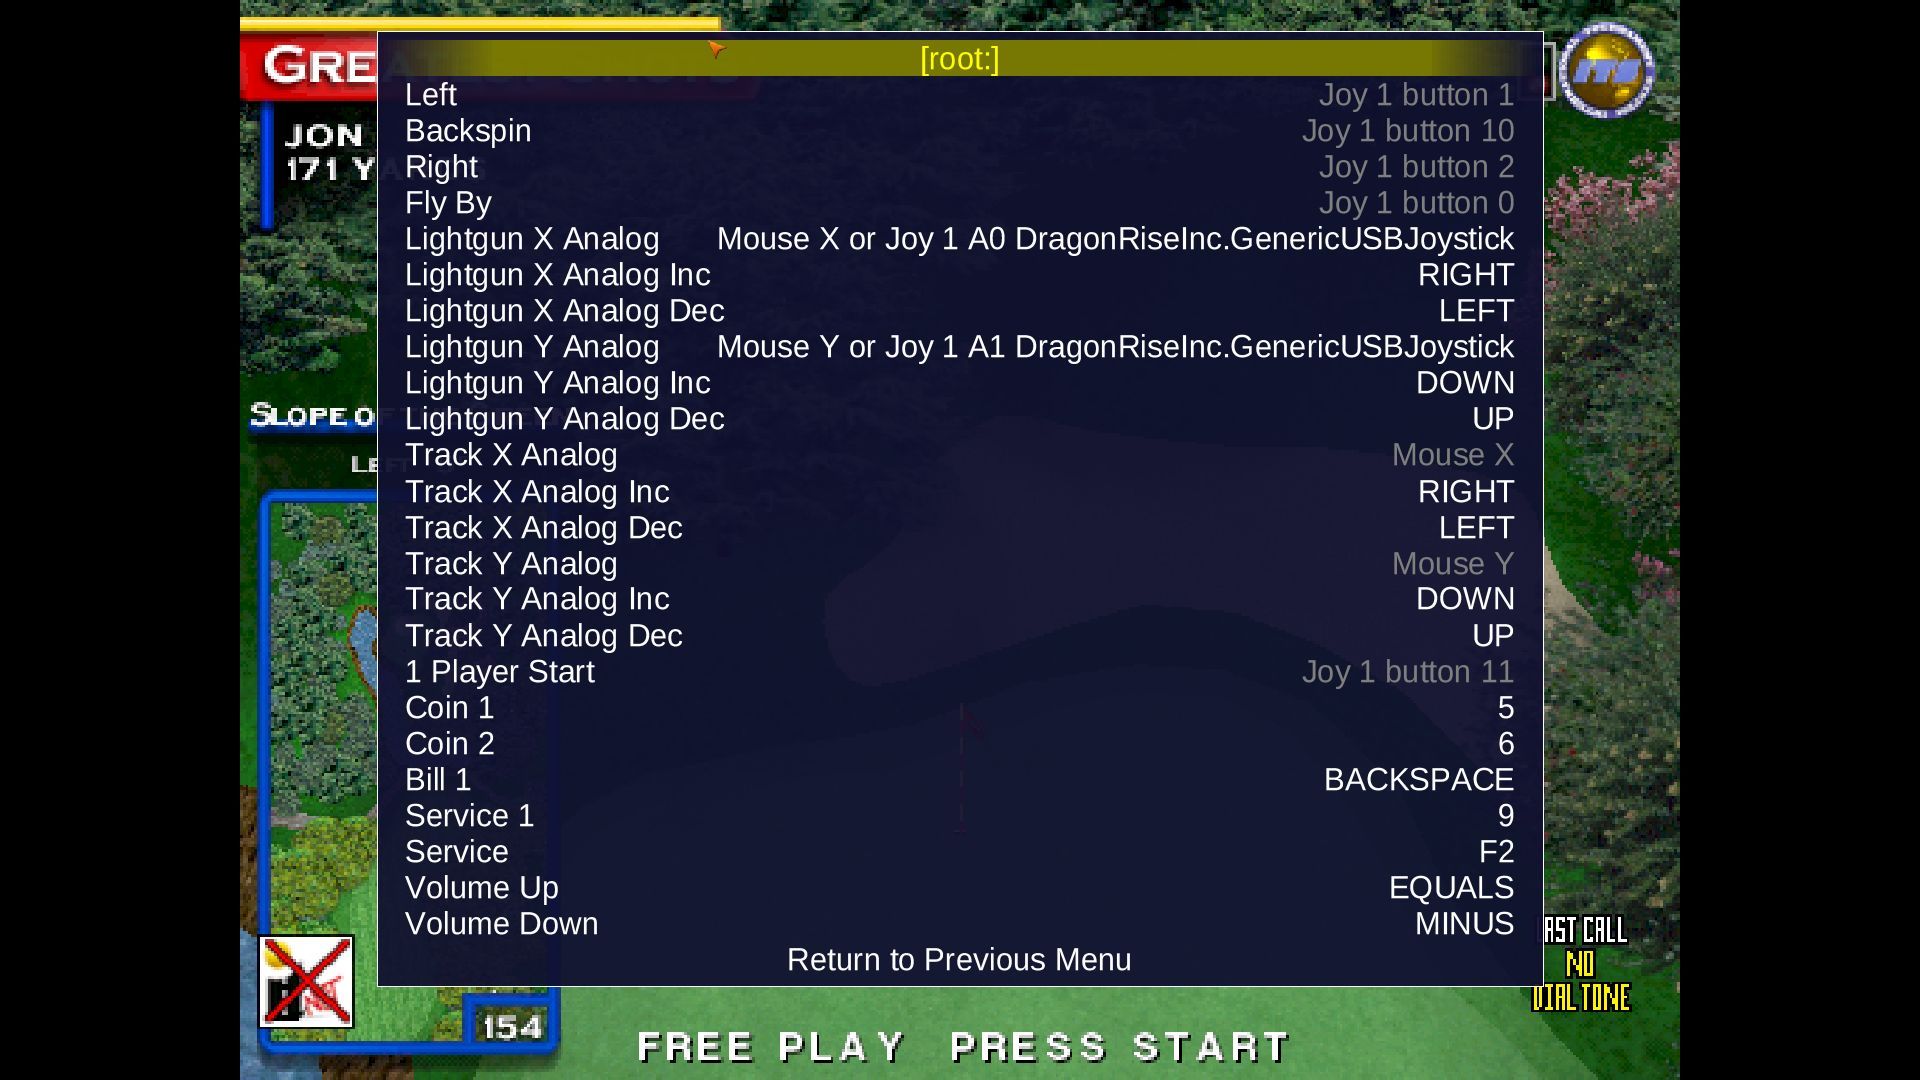
Using Input (this Machine) is valuable because the options are naturally-named to reflect the actual inputs. The game itself really only has 5 buttons:
- Look Left
- Look Right
- Fly-by
- Backspin
- Start/ Options
Select each option, then click the button on your control panel. In my case, they populated as Joy 1 button x suggesting to me that the encoder was being viewed in the game as a joystick. You can tell every option above that is "gray" means that I changed it from the default.
Map Trackball/ Sensitivity
Next, setup the trackball. From the same previous screen, you should only need to set
Track X Analog= general X movement, simply move the trackball left or right. In my case, it says "Mouse X" since my trackball is being viewed as a mouse.Track Y Analog= general Y movement, simply move the trackball up or down. In my case, it says "Mouse X" since my trackball is being viewed as a mouse.
But what about?
- Track X Analog Inc
- Track X Analog Dec
- Track Y Analog Inc
- Track Y Analog Dec
These are inputs for digital controls, which Golden Tee never had, so if you use them, you're effectively mapping a digital control to an analog one which isn't as authentic. In my case, I never touched them. I'm guessing the default RIGHT LEFT DOWN UP relate to a keyboard, a digital input, but since my control panel for the game doesn't have these keys, then no one would be able to use them anyway. I suppose you could delete them out if you really wanted.
I will caveat this is highly specific to however your trackball is registered on your machine. In my case, the trackball looked just like a mouse, so it was easy to configure. Once you have the trackball predictably working, you'll want to dial in sensitivity wise. This is very subject to opinion, but here's what I found worked best:
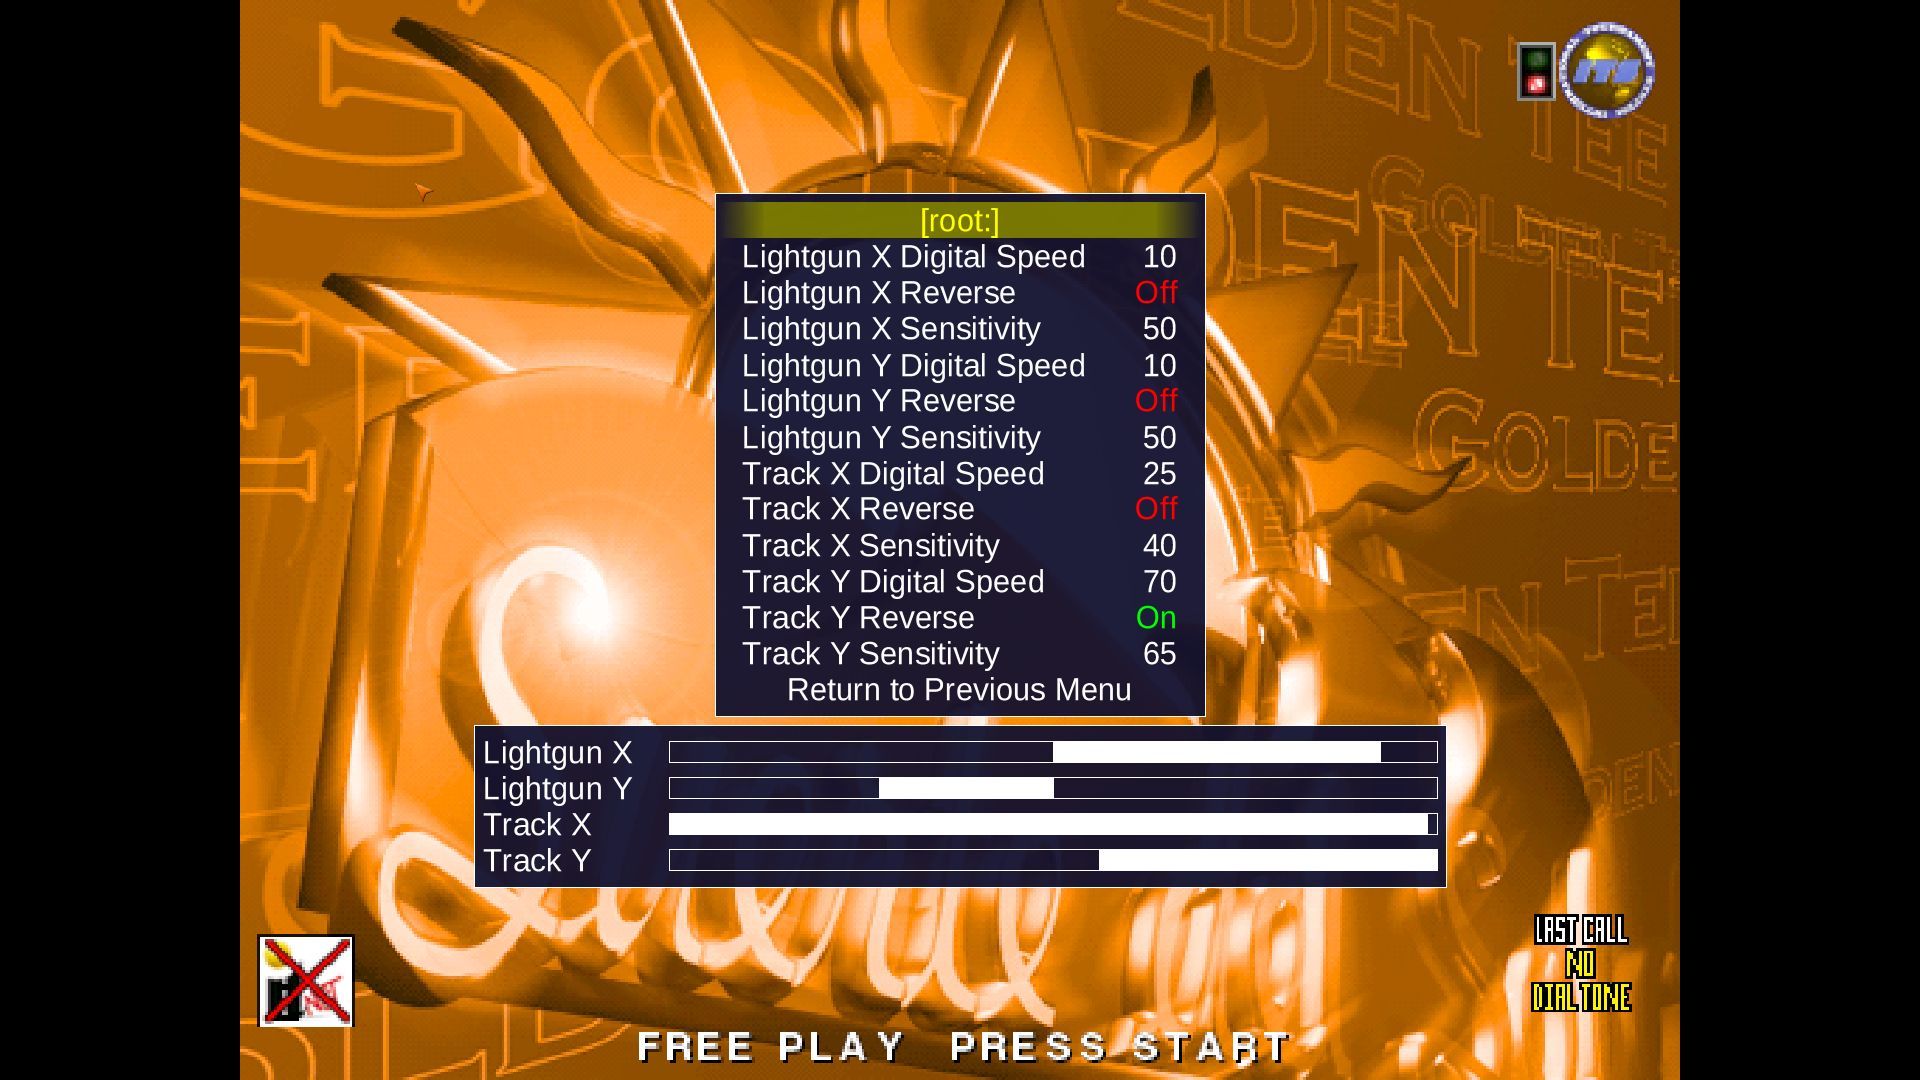
I'm pretty sure "Digital Speed" represents the speed that digital controls map to analog ones. For example, if I used my keyboard DOWN how quick will it accelerate is the Digital Speed. I apparently tweaked these in my testing, but they aren't relevant.
The only thing you care about is "Sensitivity". There's some reading online that suggests the best figure is 25/25, however I found a more natural feel as 40/65. Specifically because if you haven't played Golden Tee, it can be really easy to accidentally change clubs when you're trying to move into a backswing, so I opted to have the X sensitivity lower than Y. Again, play around with this to what feels right.
I also had to turn on Track Y Reverse to On. I don't remember exactly why, perhaps the way I mounted the trackball?
Lastly, get audio working
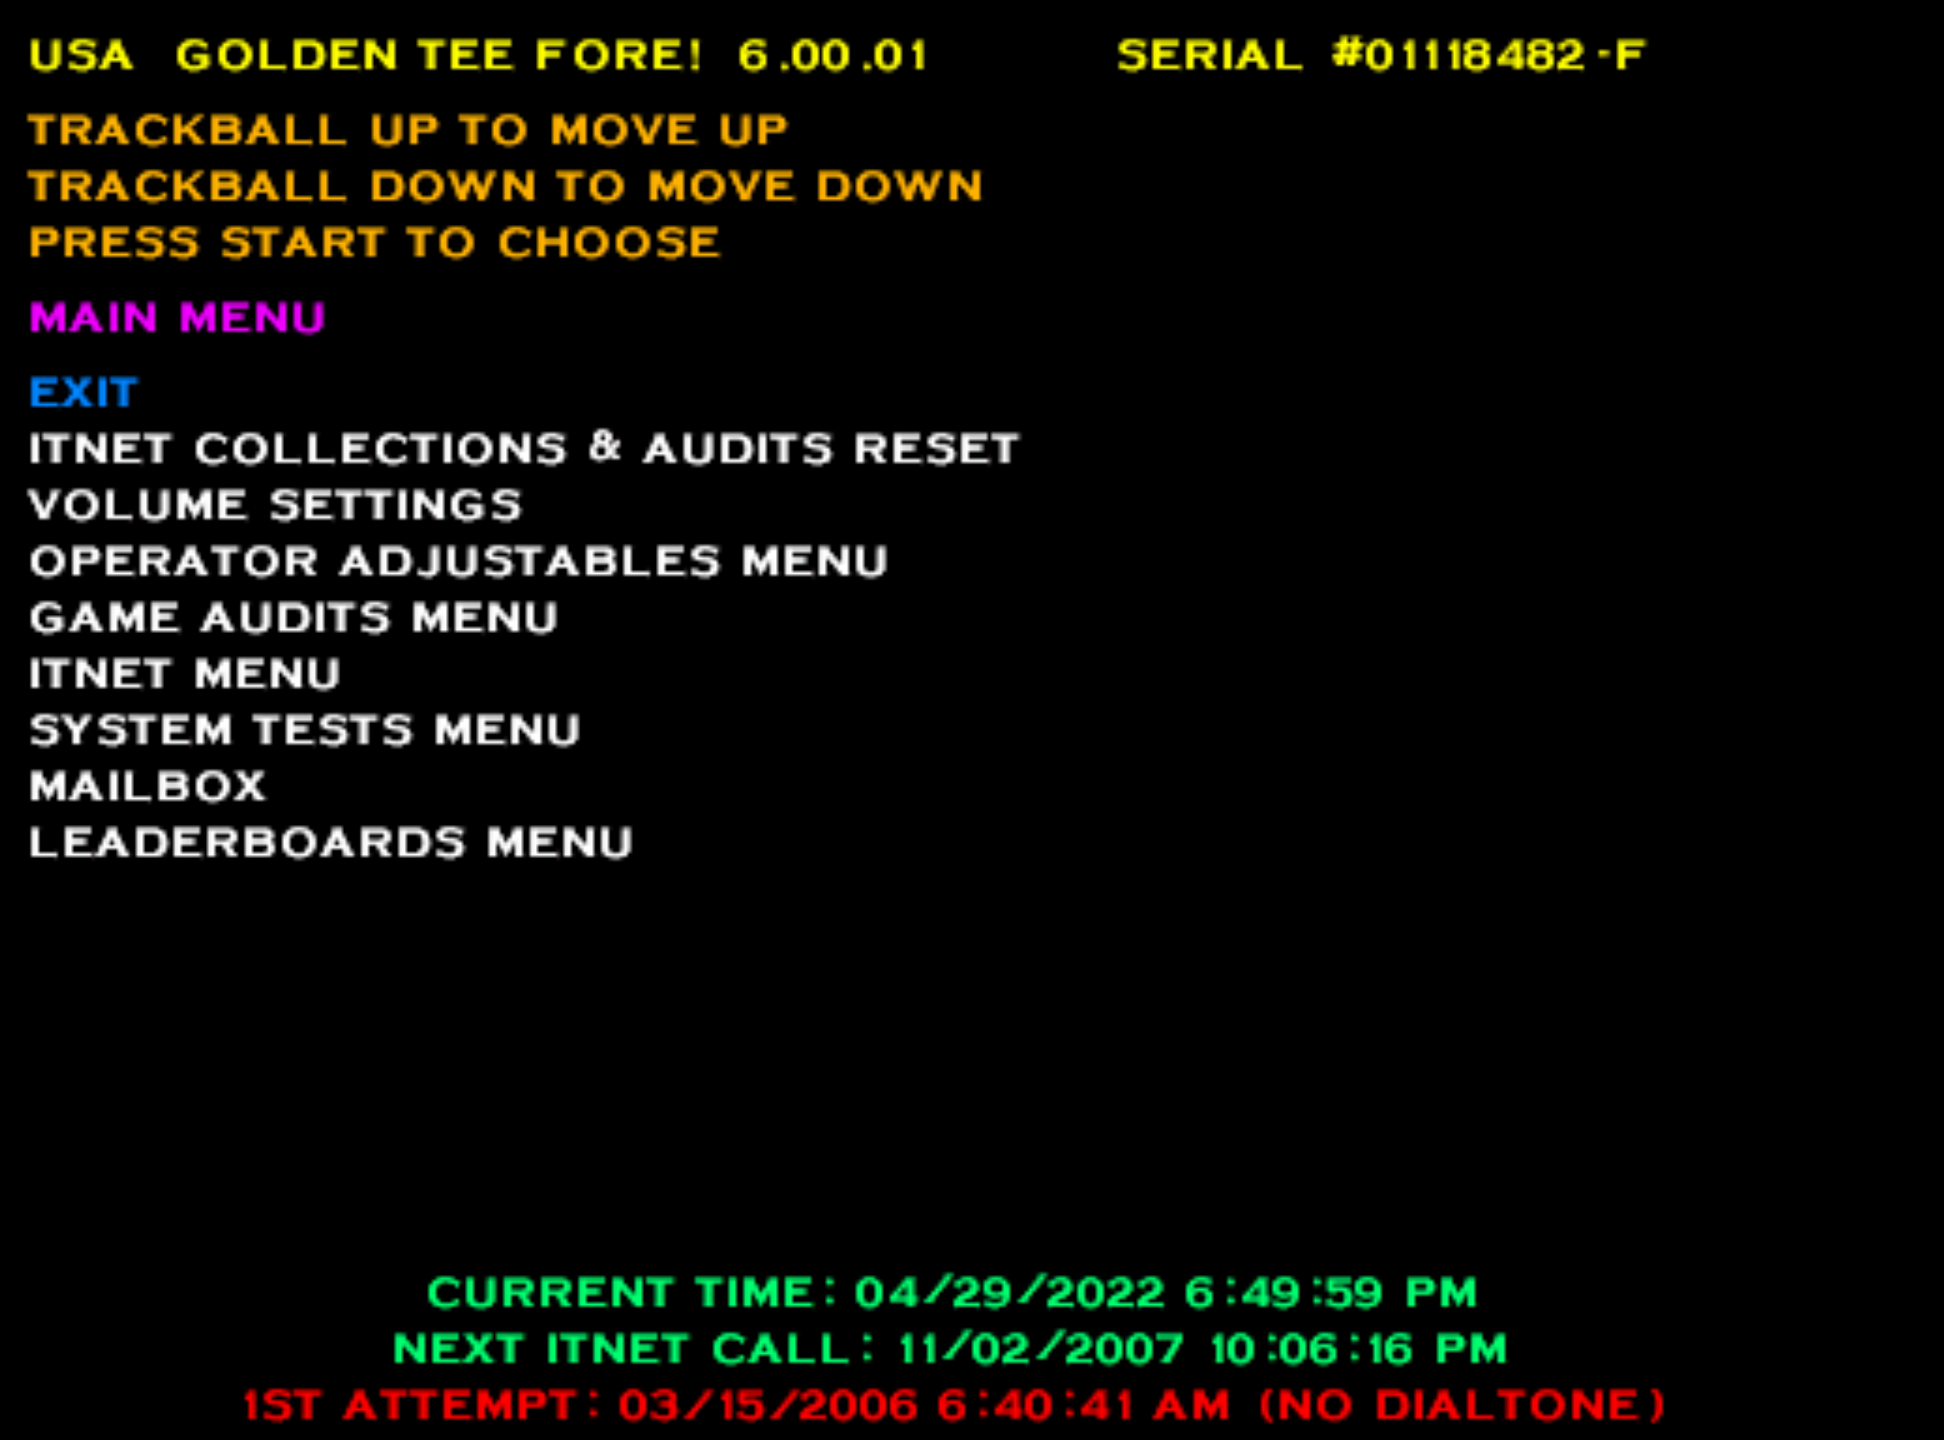
If you fired up the game and didn't hear any sound or it was exceptionally quiet for your speakers, you'll probably want to go into the actual game settings to configure this. In my case F1 launches me into the "Operator" panel for the game. In here, check Volume Settings and slide that into a good range.
You can also change the difficulty of the game here if you're an experienced Golden Tee player, reset the player leaderboards if you want to set your own records with friends, etc. You can also run some of the System Tests if you want to confirm your buttons and trackball are working as expected too. Not too much here, but a good menu to know about.
Autostart the Game
If you're like me and you built a custom cabinet to only run Golden Tee, then you might be interested in launching right into the game. The easiest way I found to do this is to just create a shell script that Linux can run when the computer starts which simply instructs MAME to run the game.
Here's my script:
#!/bin/bash
cd Desktop/goldentee/
mame gtfore06 -skip_gameinfo
Next, set this script to "autostart". Because I'm using Lubuntu which uses the LXDE desktop environment, I have to use the LXQt Session Settings > Autostart to configure this script. In this case, just add a new record and point the "command" to the location of your shell script you saved above.
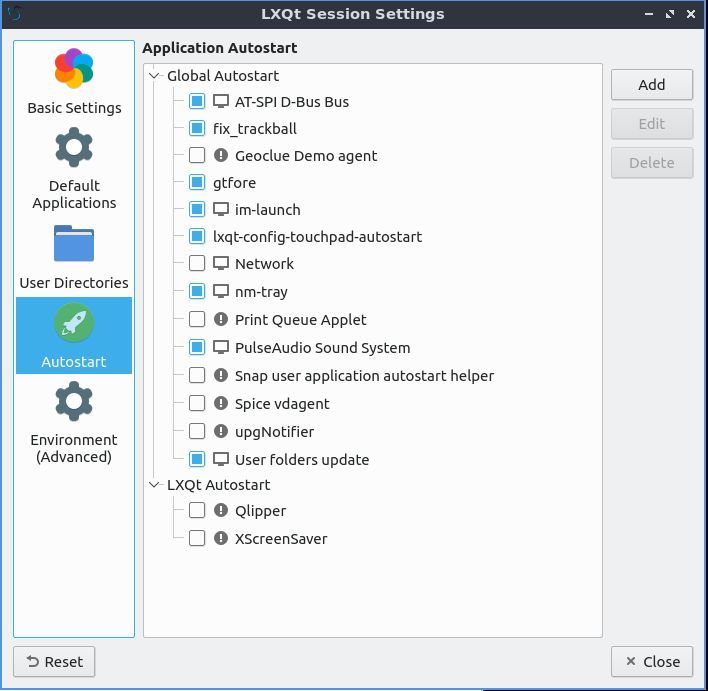
Now whenever the PC turns on, the game should automatically launch!
Trackball Woes
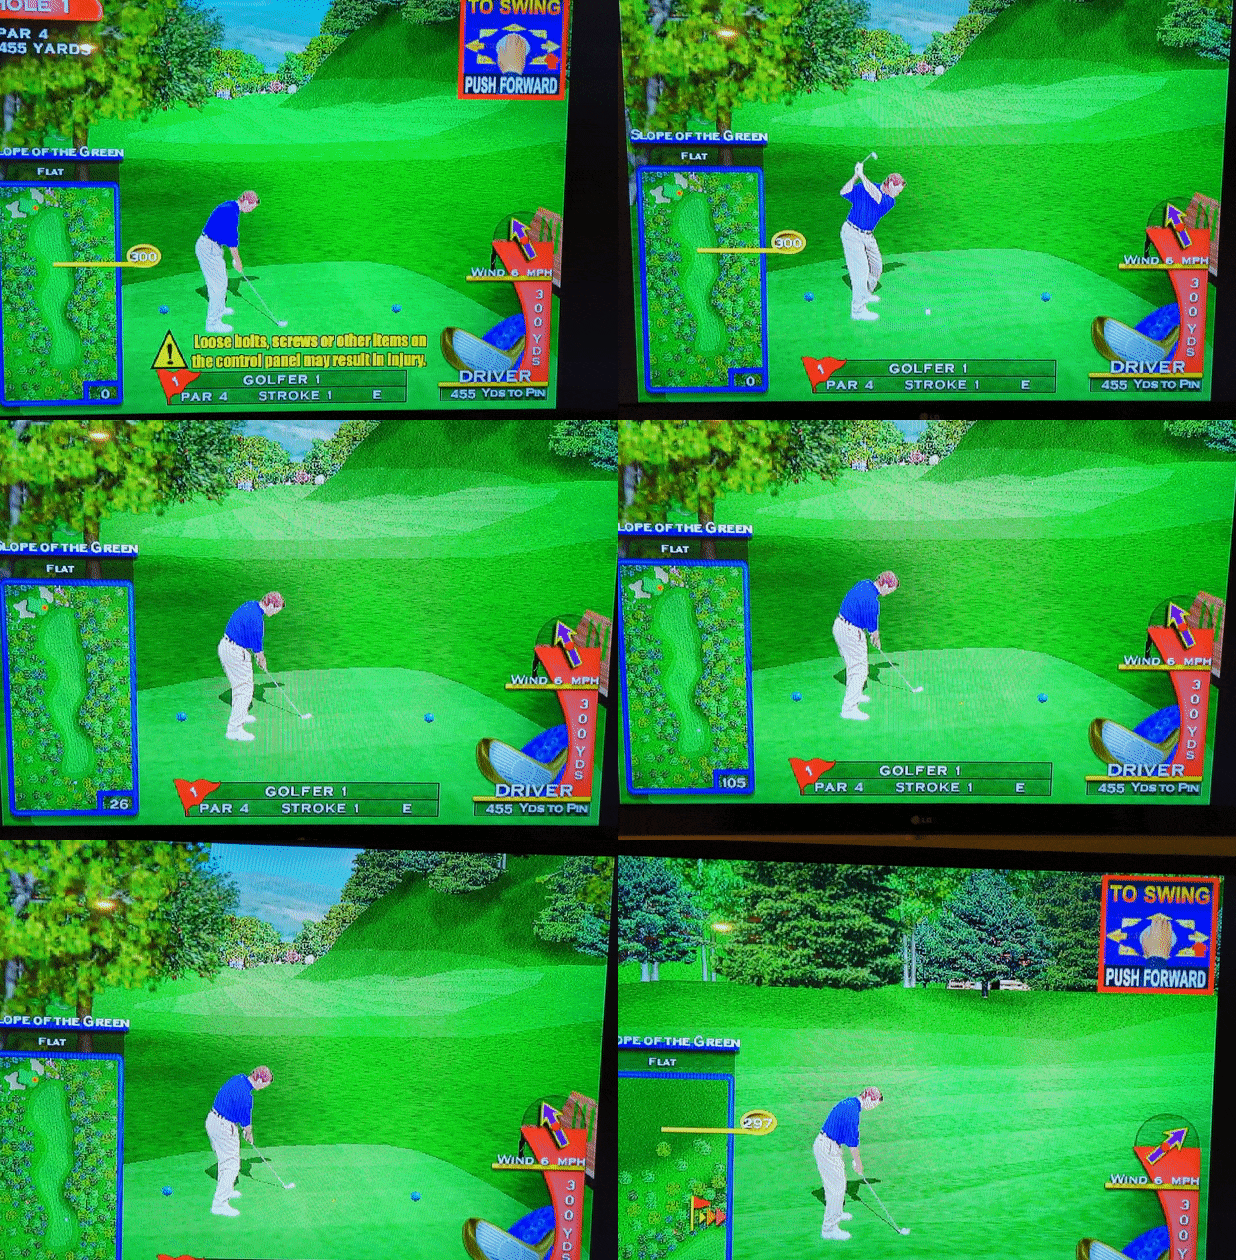
If you're using an original trackball and you go to smack your drive you may hit an issue like the above, where the swing jitters and ultimately kills the effectiveness of your drive. This is an unfortunately side effect of using an analogue trackball where the input has difficulty being converted to a digital input for the computer and back into MAME.
Now, I was able to fix this:
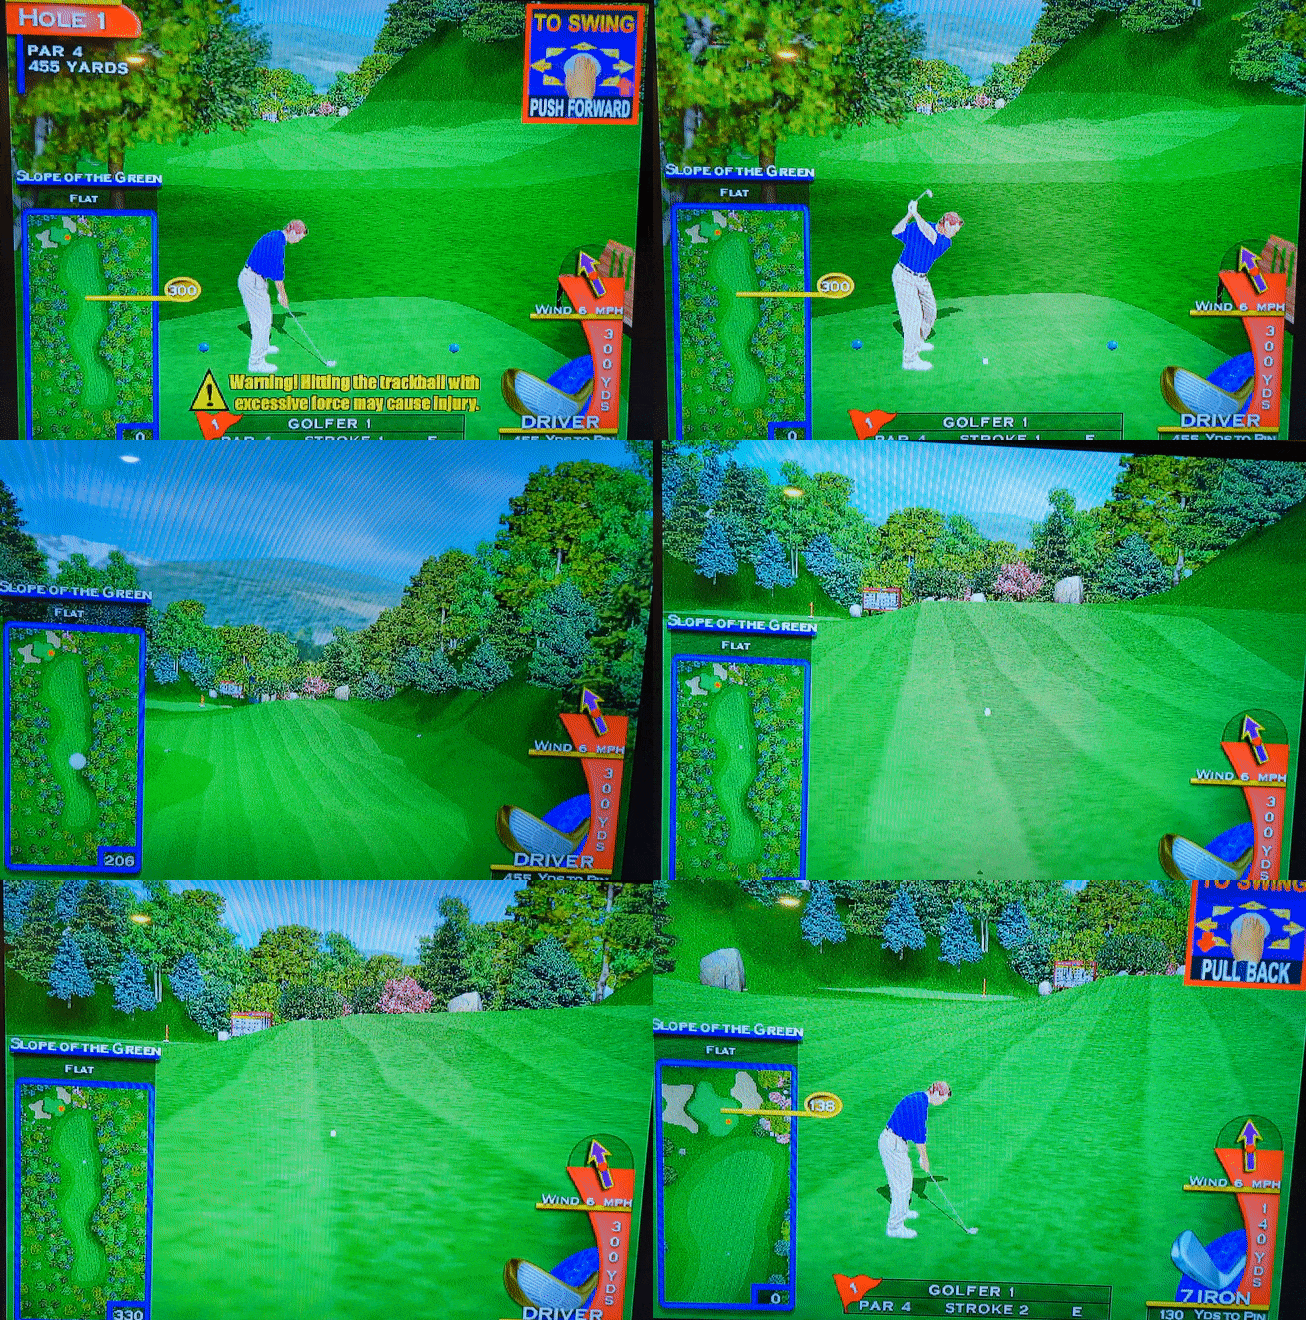
But that's for next time!
If you missed Part 1: https://bentumbleson.com/building-a-golden-tee-fore-cabinet-part-1/
And if you want to build your own arcade cabinet, and show some support for this effort on my end, I sell the design plans as well as an even more detailed write-up specific to assembling the arcade cabinet:
And Part 3: Fixing your Trackball


Member discussion: